Peanut Butter Blossoms
This post may contain affiliate links.
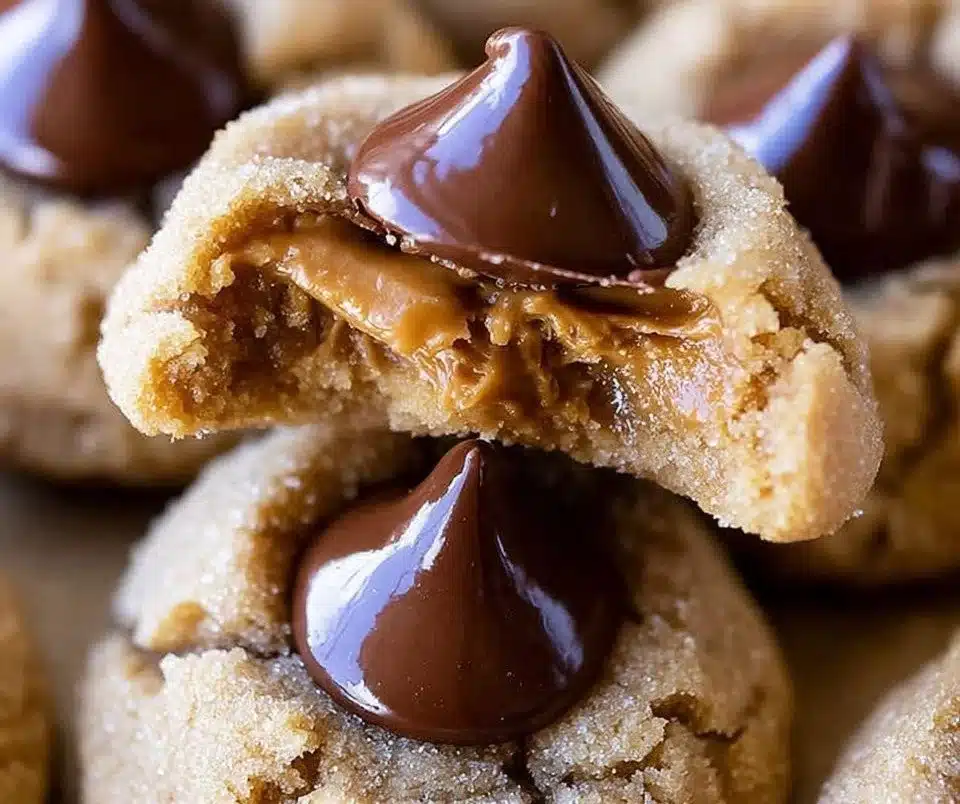
There’s something utterly delightful about the aroma of freshly baked cookies wafting through the home. It’s like a hug that wraps around you, bringing warmth and comfort. Among my favorite treats that bring back fond memories of childhood and family gatherings is the beloved Peanut Butter Blossoms. These scrumptious cookies combine the nutty richness of peanut butter with the sweet, creamy goodness of chocolate, creating an irresistible treat that never fails to evoke smiles.
Every bite of a Peanut Butter Blossom takes me back to the kitchen of my childhood, where my hands would dust off the countertop flour as I eagerly awaited the next batch to emerge from the oven. Watching those decadent cookies transform into little mounds of joy, topped with a melted chocolate Hershey’s Kiss, is a memory I treasure. Today, I want to share this delightful recipe with you, so you can weave this sweet tradition into your own life.
Understanding the Magic of Peanut Butter Blossoms
Peanut Butter Blossoms are not just any cookies; they are an icon of comfort and joy in many American households, especially around the holidays. These delightful morsels appear at family gatherings, bake sales, and holiday parties, embodying the essence of sharing and celebration. Originating in the mid-20th century, these cookies have become a staple for their perfect blend of peanut butter and chocolate, captivating taste buds across generations.
In essence, what makes these cookies unique is the way they combine textures and flavors—soft and chewy peanut butter cookies topped with a melty chocolate kiss. It’s a simple yet profound experience that transcends time and place, making it a beloved treat in homes across the nation.
Why You’ll Love This Peanut Butter Blossoms
- Flavor Harmony: The delightful combination of creamy peanut butter and sweet chocolate creates an irresistible bite that will make you crave more.
- Satisfaction Guaranteed: With the first soft bite, you’ll note their chewy texture, and the contrast between the cookie and the melted chocolate will leave you wanting another.
- Family-Friendly: These cookies are a fantastic project for children and adults alike, perfect for bonding over a shared love for baking.
- Versatile and Fun: They can be customized with different types of chocolate or toppings, allowing you to put your unique spin on them.
Perfect for These Home Cooks
- Families with Kids: The fun of pressing those chocolate kisses into the cookies is a cherished memory in the making.
- Baking Beginners: With simple steps, this recipe is approachable for those just beginning their culinary journey.
- Peanut Butter Lovers: If you adore peanut butter, these cookies will quickly become your go-to recipe.
- Gathering Hosts: Perfect for parties, these cookies are a crowd-pleaser that are sure to impress your guests.
When This Peanut Butter Blossoms Shines Most
- Family Gatherings: Bring these cookies to reunions, potluck dinners, or holiday celebrations.
- Weeknight Treats: Need a sweet pick-me-up after a long day? These cookies are easy to whip up for a cozy evening.
- Cookie Exchanges: Their classic appeal makes them ideal for sharing with friends during holiday cookie swaps.
- Special Occasions: Birthdays, anniversaries, or any occasion you want to add a personal touch of sweetness.
How to Make the Perfect Peanut Butter Blossoms
Creating these delightful cookies is a labor of love that results in a truly rewarding treat. Here’s how to make them from scratch.
Ingredients
- 1/2 cup butter (1 stick)
- 1/4 cup granulated sugar
- 3/4 cup brown sugar (packed)
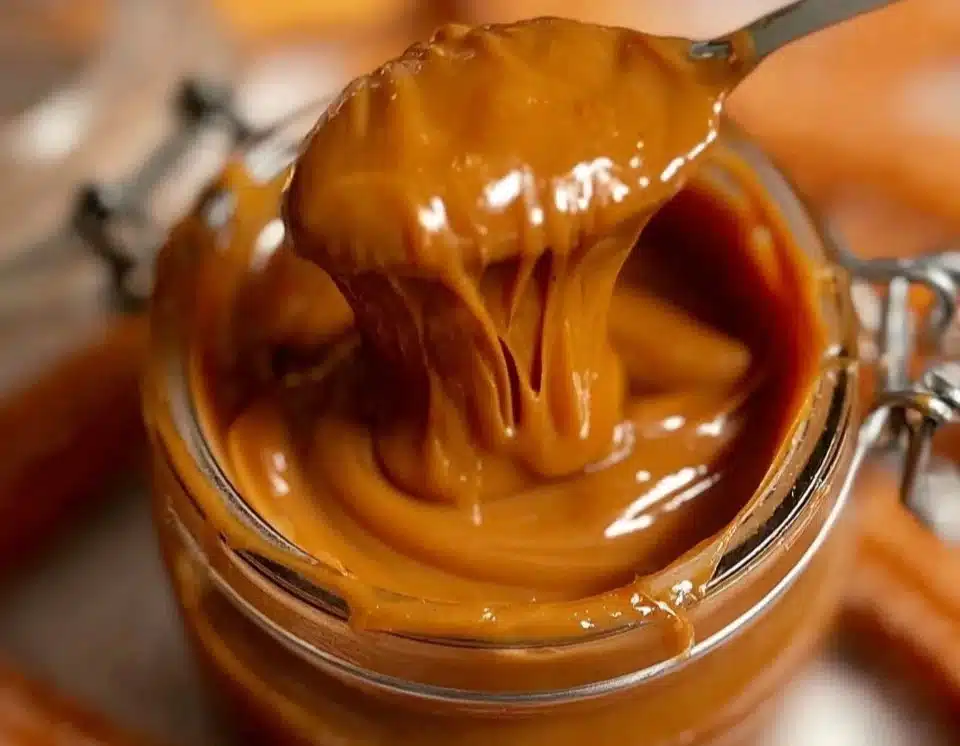
- 1 cup peanut butter (not natural pb)
- 1 large egg
- 1 & 1/2 teaspoons vanilla
- 1 and 1/2 cups all-purpose flour (spooned and leveled)
- 1 teaspoon baking soda
- 1/4 teaspoon kosher salt
- 1/2 cup granulated sugar (for rolling)
- 40 Hershey’s Kisses (about half an 11 ounce package)
Step-by-Step Instructions
- Start out by tossing your bag of Hershey’s Kisses in the freezer. If they are chilled when you press them into the cookies, the Kisses won’t fall off when the cookies cool.
- In a large bowl or stand mixer, beat the butter until it is smooth and creamy, scraping the sides of the bowl.
- Add 1/4 cup sugar and 3/4 cup packed brown sugar. Beat well until fluffy, scraping the sides. There should be no chunks of butter.
- Add 1 cup of peanut butter. I like Jif best. Beat well until combined.
- Add 1 egg and 1 and 1/2 teaspoons vanilla. Beat until combined.
- Add 1 and 1/2 cups all-purpose flour, but don’t stir it in yet. Add 1 teaspoon baking soda and 1/4 teaspoon kosher salt on top of the flour and stir it in with your teaspoon to combine the dry ingredients together a bit.
- Turn the mixer on to combine the dry ingredients into the dough. Don’t overdo it! Once the dough barely starts to come together (with some flour still visible), stop and scrape the sides and bottom of the bowl. Continue mixing until you no longer see flour streaks, then turn off the mixer. Over mixing cookie dough results in tough cookies.
- Cover the bowl and chill the dough for 15 minutes to an hour.* (Or up to 2 days!)
- Preheat the oven to 350 degrees F. Line two baking sheets with parchment paper or a silicone baking mat. Add about 1/2 cup granulated sugar to a bowl.
- Shape the dough into 1 inch balls. I used a cookie scoop.
- Roll each ball in the sugar to coat. Place on a baking sheet. I added 15 cookies to an 11×17 inch pan. The cookies don’t spread much at all, so you can place them closer together than regular cookies.
- Bake the cookies at 350 for about 8-10 minutes. The cookies are done baking when the edges are set, tap it with your finger. The center should be matte, not shiny. These cookies do not spread much; they will be plump little mounds.
- Meanwhile, unwrap about 40 Hershey’s Kisses. Place them in a bowl and put them back in the freezer until the cookies are done baking.
- Remove the cookies from the oven and immediately press one frozen Hershey’s kiss on top of each cookie. The edges should crack beautifully.
- Let the cookies set up on the pan for about 5 minutes before transferring to a wire rack to cool completely. The chocolate kiss will melt completely but maintain its shape. Let them cool undisturbed so the kisses don’t get messed up. You can pop the pan in the fridge or freezer if you want to speed it up.
- If you know what’s good for you, eat at least one of these warm, with a tall glass of milk!
For People with Diabetes: Sugar Substitutes
If you are looking for sugar-free alternatives to enjoy Peanut Butter Blossoms, consider using stevia, monk fruit, or allulose. These substitutes can help maintain sweetness without raising blood sugar levels. Avoid using honey or maple syrup, as they contain sugars that may not be suitable for diabetic diets.
Essential Tools for Peanut Butter Blossoms
- Mixing bowls
- Stand mixer or hand mixer
- Measuring cups and spoons
- Rubber spatula
- Baking sheets
- Parchment paper or silicone baking mat
Pro Tips to Elevate Your Peanut Butter Blossoms
- Chill the dough: This helps the cookies maintain their shape and prevents them from spreading too much during baking.
- Don’t overmix: Combine until just mixed for that soft, chewy texture.
- Experiment with add-ins: For a fun twist, consider adding chopped nuts, chocolate chips, or even a splash of your favorite extract.
- Use chilled chocolate: Freezing the Hershey’s Kisses makes them less likely to slide off the warm cookie as they cool.
How to Store & Reheat Peanut Butter Blossoms
- Fridge: Store cookies in an airtight container for up to one week.
- Freezer: To freeze, layer parchment paper between cookies in an airtight container for up to three months.
- Reheating: To enjoy warm cookies, microwave them for about 10-15 seconds or pop them in a preheated oven at 350°F for a few minutes.
Common Mistakes to Avoid
- Using natural peanut butter: Stick to processed peanut butter as it has a better consistency and sweetness for cookies.
- Overbaking: Watch the timing closely to prevent dry cookies; they should be slightly underbaked when you take them out.
- Neglecting to chill the dough: This step is vital for great texture and shape, so don’t skip it!
Your Peanut Butter Blossoms Questions Answered
- Can I use natural peanut butter? No, it’s best to avoid natural peanut butter as it can alter the texture of the cookies.
- How should I store my cookies? Yes, store them in an airtight container in the fridge.
- Can these be made gluten-free? It depends on the flour substitute used; gluten-free all-purpose flour can work well.
- What can I use instead of Hershey’s Kisses? Yes, try using any chocolate candy like Rolos or chocolate chips.
Final Thoughts on Peanut Butter Blossoms
Baking Peanut Butter Blossoms in your kitchen can be a magical experience filled with love and laughter. The simple ingredients and quick process yield a sweet reward that can bring comfort and joy to your home. I encourage you to give this recipe a try, and when you do, please share your thoughts and variations! Happy baking and enjoy every bite of these delightful cookies!

{image_template}
Print
Peanut Butter Blossoms
- Total Time: 40 minutes
- Yield: 24 servings 1x
- Diet: Vegetarian
Description
Delightful cookies combining nutty peanut butter and creamy chocolate, perfect for family gatherings and special occasions.
Ingredients
- 1/2 cup butter (1 stick)
- 1/4 cup granulated sugar
- 3/4 cup brown sugar (packed)
- 1 cup peanut butter (not natural)
- 1 large egg
- 1 and 1/2 teaspoons vanilla
- 1 and 1/2 cups all-purpose flour (spooned and leveled)
- 1 teaspoon baking soda
- 1/4 teaspoon kosher salt
- 1/2 cup granulated sugar (for rolling)
- 40 Hershey’s Kisses (about half an 11 ounce package)
Instructions
- Start out by tossing your bag of Hershey’s Kisses in the freezer.
- In a large bowl or stand mixer, beat the butter until smooth and creamy.
- Add 1/4 cup sugar and 3/4 cup packed brown sugar, beat well until fluffy.
- Add 1 cup of peanut butter and beat well until combined.
- Add 1 egg and 1 and 1/2 teaspoons vanilla; beat until combined.
- Add 1 and 1/2 cups all-purpose flour, then 1 teaspoon baking soda and 1/4 teaspoon kosher salt on top of the flour.
- Turn the mixer on to combine the dry ingredients into the dough.
- Cover the bowl and chill the dough for 15 minutes to an hour.
- Preheat the oven to 350°F.
- Shape the dough into 1 inch balls and roll in sugar.
- Place on baking sheets and bake for about 8-10 minutes.
- Remove from the oven and press one frozen Hershey’s kiss on top of each cookie.
- Let the cookies set for about 5 minutes before transferring to a wire rack to cool.


Notes
For a fun twist, consider adding chopped nuts or chocolate chips. Store cookies in an airtight container.
- Prep Time: 30 minutes
- Cook Time: 10 minutes
- Category: Dessert
- Method: Baking
- Cuisine: American
Nutrition
- Serving Size: 1 cookie
- Calories: 150
- Sugar: 12g
- Sodium: 100mg
- Fat: 7g
- Saturated Fat: 3g
- Unsaturated Fat: 4g
- Trans Fat: 0g
- Carbohydrates: 19g
- Fiber: 1g
- Protein: 3g
- Cholesterol: 15mg