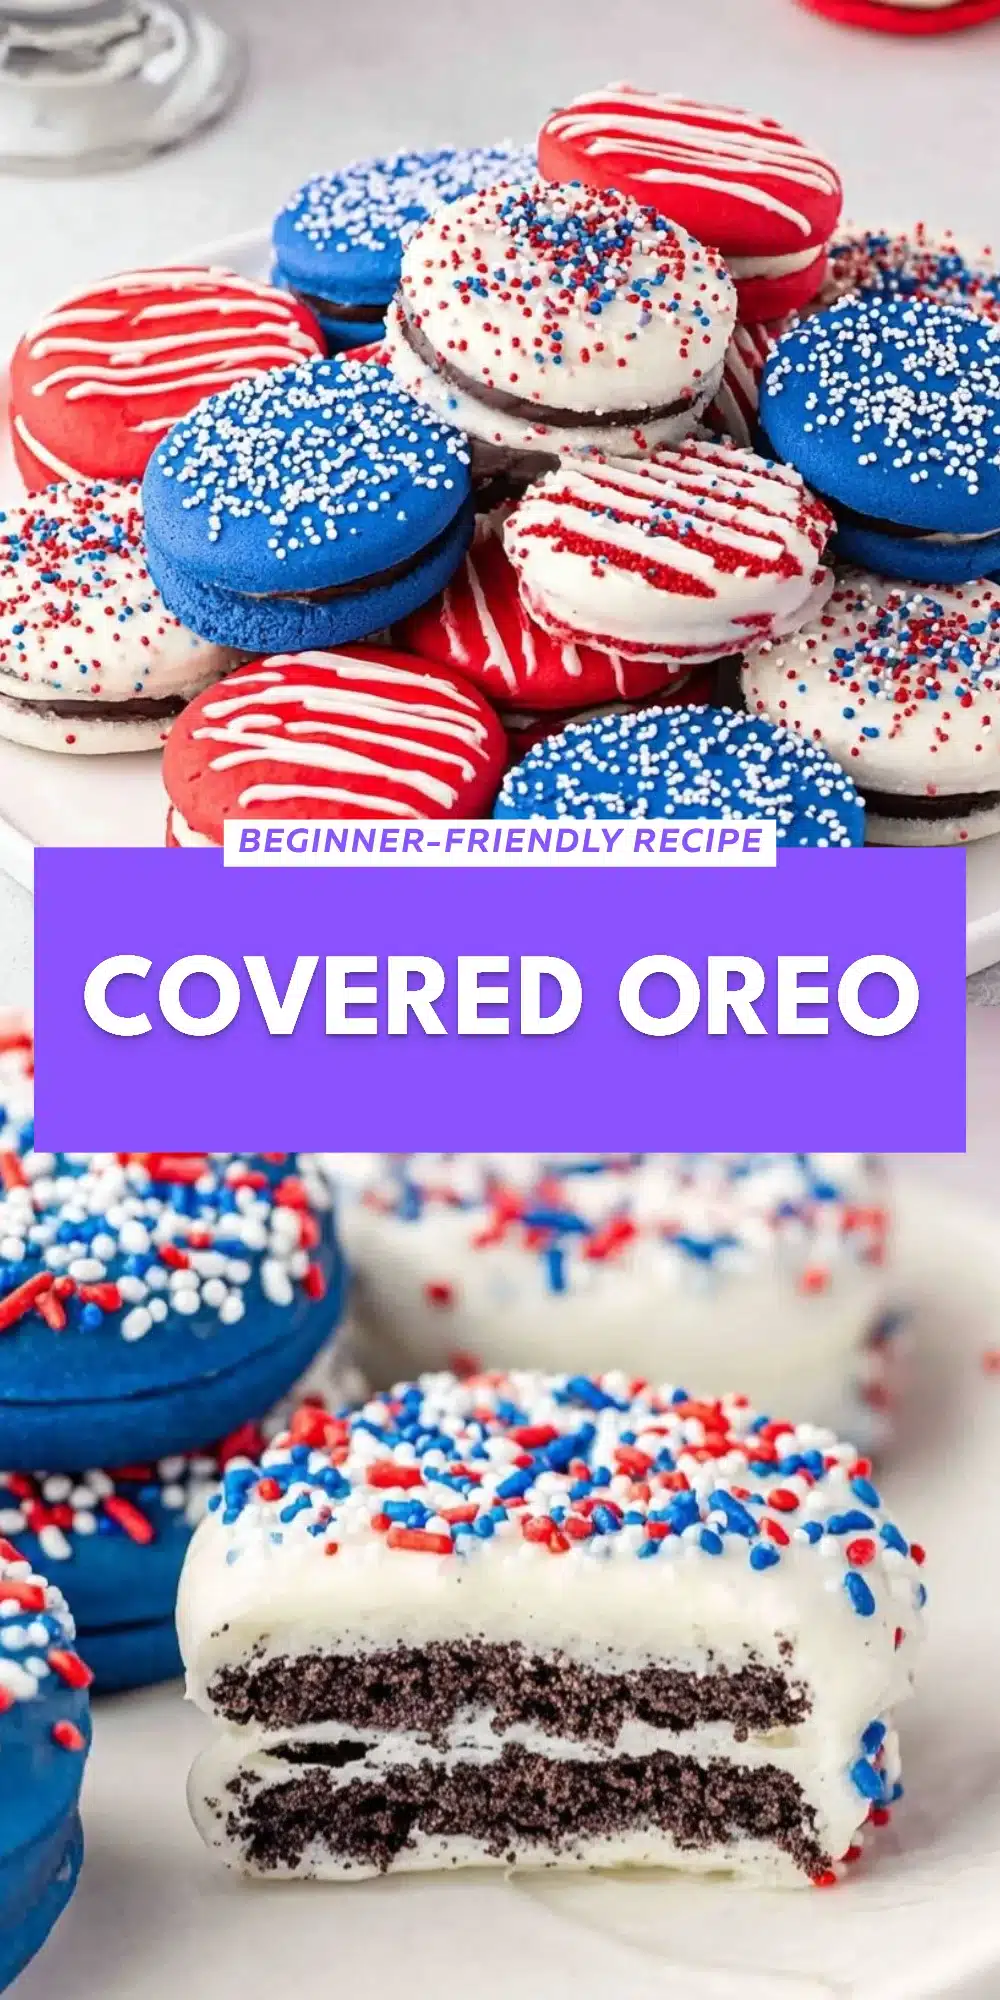
Covered Oreo
This post may contain affiliate links.
Covered Oreos are a celebration of sweetness and nostalgia, a delightful treat that brings back memories of childhood and the joy of sharing. As I pondered my favorite desserts, the image of these decadent, cream-filled cookie balls draped in luscious melting chocolate danced in my mind. With their festive colors and irresistible taste, Covered Oreos not only satisfy a sweet tooth but also embody the warmth of family gatherings and happy moments.
The first bite of a Covered Oreo is nothing short of magical. The crunch of the Oreo cookie complements the creamy richness of cream cheese, all perfectly enveloped in a coat of melting chocolate. As I recall family picnics and backyard barbecues, there’s something incredibly heartwarming about sharing these delightful treats with loved ones. Covered Oreos are not just a dessert; they are a bridge between generations, a classic that continues to bring joy.
Exploring the Roots of Covered Oreo
The Covered Oreo has become a beloved staple in many households, transcending traditional dessert boundaries. These treats remind us of the simple pleasures in life. With their origins deeply rooted in American culture, Oreos themselves have long been a popular cookie, and the Covered Oreo is just a fun, creative twist on a classic favorite. I often think of how these treats have evolved, from casual snacks to festive creations, and how they have made their way into celebrations large and small.
The magic of Covered Oreos lies in their versatility; they can be adapted to suit any occasion. Whether it’s a holiday gathering, a birthday celebration, or a simple weeknight dessert, these sweet delights bring a little extra joy to the table. They represent the comfort of familiar flavors, yet they capture the creativity of modern baking. Each bite of a Covered Oreo evokes happy memories and encapsulates the joy of sharing delicious treats with those we love.
Why You’ll Love This Covered Oreo
- Decadent Flavor: The combination of crushed Oreos, creamy filling, and a chocolate coating creates a symphony of textures and flavors that is simply irresistible.
- Easy to Make: This recipe is straightforward and requires minimal effort, making it perfect for home cooks of all skill levels.
- Family Appeal: Kids and adults alike will be enamored with these delightful bites, making them an instant hit at gatherings.
- Customizable: You can easily switch up the colors and toppings to match any celebration or occasion, making them perfect for any seasonal event.
Who Will Enjoy This Covered Oreo Most
- Busy families looking for quick, easy treats.
- Beginners who want to impress with a simple yet stunning dessert.
- Foodies who appreciate a classic twist on a beloved favorite.
- Children and the young at heart, eager for a tasty snack.
Perfect Moments to Enjoy Covered Oreo
- Holidays: Decorate with seasonal colors for festive occasions like Independence Day or Halloween.
- Gatherings: Serve them at family reunions, parties, or get-togethers where sweet treats are a must.
- Cozy Nights: Enjoy them as a comforting dessert during family movie nights.
- Potlucks: Stand out with these eye-catching treats, sure to be a talking point among guests.
How to Make the Perfect Covered Oreo
Creating these divine Covered Oreos is a joy in itself, one that fills the kitchen with laughter and delicious aromas. Follow these simple steps, and you’ll be enjoying a batch of these delightful cookies in no time.
Ingredients
- 2 packages Oreo cookies
- 1 cup cream cheese, softened
- 1 cup red melting chocolate
- 1 cup blue melting chocolate
- Sprinkles (red, white, and blue)
Step-by-Step Instructions
Crush the Oreo cookies into fine crumbs using a food processor or by placing them in a ziplock bag and rolling with a rolling pin.

Combine the crushed Oreos with softened cream cheese in a mixing bowl. Blend until well combined, forming a thick dough.
Roll the mixture into small balls, about 1 inch in diameter, and place them on a baking sheet lined with parchment paper.
Chill the Oreo balls in the refrigerator for about 30 minutes until firm.
Melt the red melting chocolate according to the package instructions. Dip each Oreo ball into the melted chocolate until fully coated.
Place the coated Oreos back on the parchment-lined baking sheet.
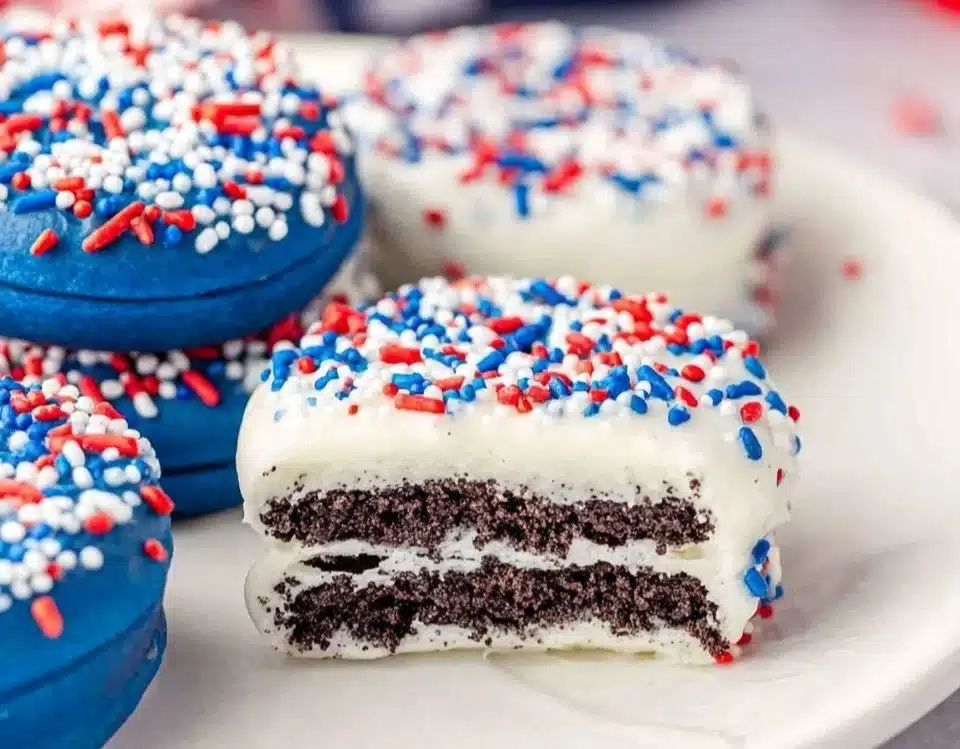
Sprinkle red, white, and blue sprinkles on top while the chocolate is still wet.
Melt the blue melting chocolate and repeat the process, this time drizzling it on top of the already coated Oreos.
Chill again in the refrigerator for another 30 minutes to allow the chocolate to set completely.

For People with Diabetes: Sugar Substitutes
If you’re looking for sugar-free alternatives, you can use sweeteners like stevia, monk fruit, or allulose. Just be cautious to avoid honey or maple syrup, as these can still impact blood sugar levels.
Essential Tools for Covered Oreo
- Mixing bowls
- Baking sheet
- Parchment paper
- Food processor or rolling pin
- Ziplock bags
Pro Tips to Elevate Your Covered Oreo
- Experiment with flavors: Add a splash of extract, such as vanilla or peppermint, to the cream cheese for an exciting twist.
- Chill longer if needed: If your mixture seems too soft, don’t rush the chilling process; this will help achieve perfect shapes.
- Be Creative with Toppings: Try out different colored sprinkles, crushed nuts, or drizzle additional chocolate for a professional touch.
How to Store & Reheat Covered Oreo
- Refrigerator: Store Covered Oreos in an airtight container in the fridge for up to one week.
- Freezer: For longer storage, freeze them in a single layer. Once frozen, transfer to a sealable bag for up to three months.
- Thawing: Let them sit at room temperature for a few minutes before serving after freezing. No reheating required!
Common Mistakes to Avoid
- Not chilling long enough: Skimping on chill time can lead to soft, messy balls that won’t hold their shape.
- Overheating chocolate: Be careful when melting chocolate; overheating can ruin its texture and flavor.
- Skipping the sprinkles: These not only add visual appeal but also a delightful added crunch.
Frequently Asked Questions: Covered Oreo
Can I use gluten-free Oreos for this recipe?
Yes, gluten-free Oreos work just as well, making this recipe suitable for those with gluten sensitivities.How can I make this recipe dairy-free?
Use dairy-free cream cheese and melting chocolate for a vegan-friendly version.Do these need to be refrigerated?
Yes, it’s best to refrigerate them to keep the chocolate firm and the filling fresh.Can I make these in advance?
It depends. They can be made a few days in advance; just store them correctly to maintain freshness.What if I want to make different flavors?
You can mix in flavored extracts or use different types of melting chocolate for varied tastes.
Wrap Up: The Joy of Covered Oreo
Savoring a Covered Oreo is about so much more than just tasting a sweet treat; it is about the joy of making memories and sharing them with those we love. I invite you to embrace this delightful recipe, fostering connections, and cherishing sweet moments. Please let me know how your Covered Oreos turn out in the comments below or share your variations with me!