Oreo Icebox Cake
This post may contain affiliate links.
When I think of summer evenings, a vivid memory comes to mind: warm nights spent with family, laughter echoing through the air, and the sweet, rich taste of Oreo Icebox Cake melting in my mouth. This delightful no-bake dessert has been a staple at our gatherings for years, evoking nostalgia with every delicious bite. The way the creamy layers blend with the iconic Oreo cookies is truly a match made in dessert heaven.
There’s something incredibly satisfying about a recipe like Oreo Icebox Cake. You don’t need to bake or spend hours in the kitchen, yet you end up with a show-stopping dessert that will impress everyone. With just a handful of straightforward ingredients, it’s both simple and indulgent—just the way I like it.
Exploring the Roots of Oreo Icebox Cake
Oreo Icebox Cake is a cherished treat that has evolved over the years, taking its place in the hearts and homes of countless families. With roots tracing back to the fantastic traditions of layering desserts, this cake embodies the beauty of simplicity and delight. The original recipe has graced many tables since the cookies first burst onto the scene in the early 20th century. Who would have imagined that these humble cookies would become the star ingredient in a dessert that brings us all together?
This no-bake cake showcases a fusion of textures, flavors, and memories, combining rich creaminess with a chocolate crunch. It’s perfect for gatherings, holiday celebrations, and even cozy nights at home. Each layer is a love letter to our shared experiences, symbolizing not just a dessert but also the joy of creating together.
Why You’ll Love This Oreo Icebox Cake
- Flavor Explosion: The combination of creamy whipped topping and crunchy cookies creates a delightful contrast that keeps you coming back for more.
- Effortless Preparation: No baking means you have more time to relax and enjoy the company of your loved ones.
- Family-Friendly: This dessert is beloved by kids and adults alike, making it ideal for any occasion.
- Versatile: You can customize it with various toppings or alternate cookies to suit your tastes, allowing your creativity to shine through.
Who Will Enjoy This Oreo Icebox Cake Most
- Busy Families: Simple and quick to prepare, making it perfect for parents with a packed schedule.
- Baking Beginners: The straightforward process allows anyone to make a dessert that looks professional.
- Food Lovers: Everyone who appreciates indulgent desserts will cherish this creamy treat.
- Chocolate Enthusiasts: If you love Oreos and sweet cream, this cake is sure to satisfy your cravings.
Perfect Moments to Enjoy Oreo Icebox Cake
Oreo Icebox Cake shines during any occasion, including:
- Summer Gatherings: A refreshing treat perfect for warm weather parties.
- Birthdays: Swap out traditional cakes for this crowd-pleaser at celebrations.
- Holidays: It pairs beautifully with festive meals and festivities.
- Winding Down: Enjoy a slice while cozying up on the couch during a movie night.
How to Make the Perfect Oreo Icebox Cake
Creating the perfect Oreo Icebox Cake is an enjoyable journey that requires minimal effort and maximum love. Let’s dive into the delicious details!
Ingredients
- 24 Oreo cookies
- 2 cups heavy whipping cream
- 1/4 cup powdered sugar
- 1 tsp vanilla extract
- Optional: Chocolate shavings, crushed Oreos, fresh berries
Step-by-Step Instructions
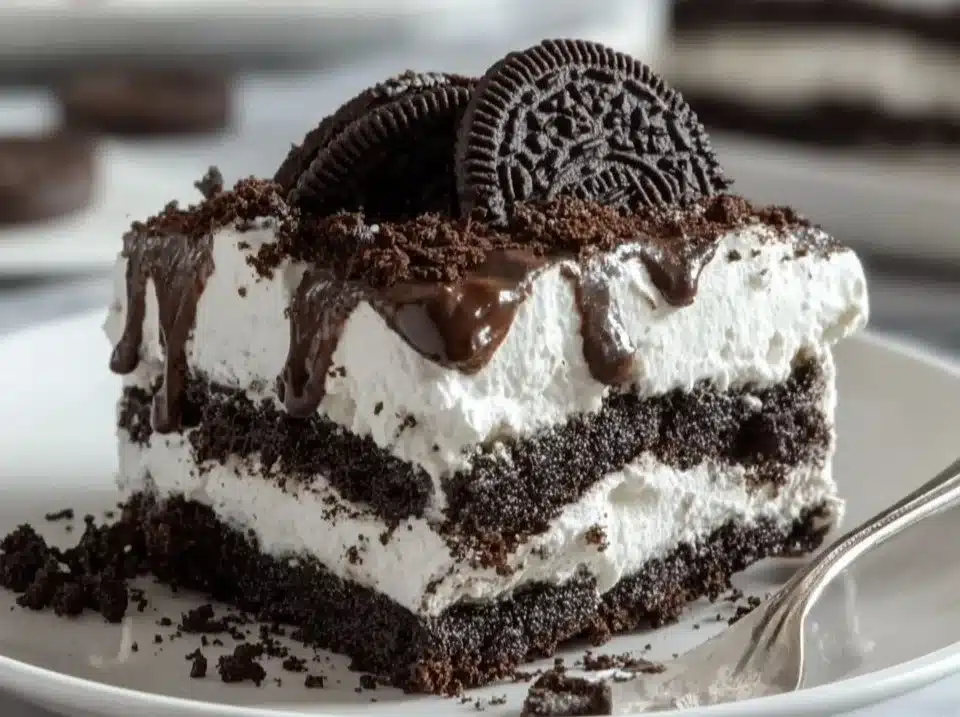
Whip heavy cream, powdered sugar, and vanilla in a chilled bowl until stiff peaks form. Avoid overwhipping.
{image_2}
Spread a thin layer of whipped cream in a rectangular dish.
Place Oreos side by side for the first layer. Press gently to stabilize.
Spread another layer of whipped cream evenly.
Repeat cookie and cream layers until finished.
Top with a final cream layer.

Cover and refrigerate for at least 4–6 hours or overnight.
Garnish with crushed Oreos, chocolate shavings, or berries before slicing. Serve chilled.

For People with Diabetes: Sugar Substitutes
Here are suitable sugar-free alternatives you can use if you’re looking for lower sugar options:
- Stevia
- Monk fruit
- Allulose
Note: Avoid using honey or maple syrup as substitutes, as they can still raise blood sugar levels significantly.
Essential Tools for Oreo Icebox Cake
- Mixing bowl
- Electric mixer or whisk
- Rectangular dish
- Spatula
Pro Tips to Elevate Your Oreo Icebox Cake
- Choose Quality Ingredients: Using high-quality heavy cream can significantly improve the texture and taste.
- Chill Your Bowl: A cold mixing bowl helps achieve stiffer peaks faster when whipping cream.
- Don’t Rush the Layers: Spreading evenly between layers ensures a well-structured cake.
- Experiment with Flavors: Swap out vanilla for a flavored extract or add cocoa powder to the cream for added richness.
Common Mistakes to Avoid
- Overwhipping Cream: This can lead to a grainy texture. Stop once you see stiff peaks.
- Not Refrigerating Long Enough: Letting it sit overnight allows the flavors to meld beautifully.
- Forgetting to Press the Oreos: Pressing them helps create stability and ensures your layers stay intact.
FAQs About Oreo Icebox Cake
Can I use different cookies?
Yes, experimenting with other flavors like chocolate or peanut butter cookies can be delightful!How long will it stay fresh?
It depends. The cake can be stored in the refrigerator for up to 3 days.Is this suitable for gluten-free diets?
It depends. You could use gluten-free Oreo cookies for a suitable alternative.Can I prepare it ahead of time?
Yes, making it a day in advance is ideal for flavor enhancement.Should I serve it frozen?
No, it’s best served chilled for the perfect creamy consistency.
Wrapping Up: The Joy of Oreo Icebox Cake
Oreo Icebox Cake isn’t just a dessert; it’s a celebration of togetherness, simplicity, and sweetness. Whether it’s a family gathering or a quiet evening at home, this cake adds joy to every occasion. I’d love to hear about your experiences with Oreo Icebox Cake or any adaptations you made—share your story in the comments below!
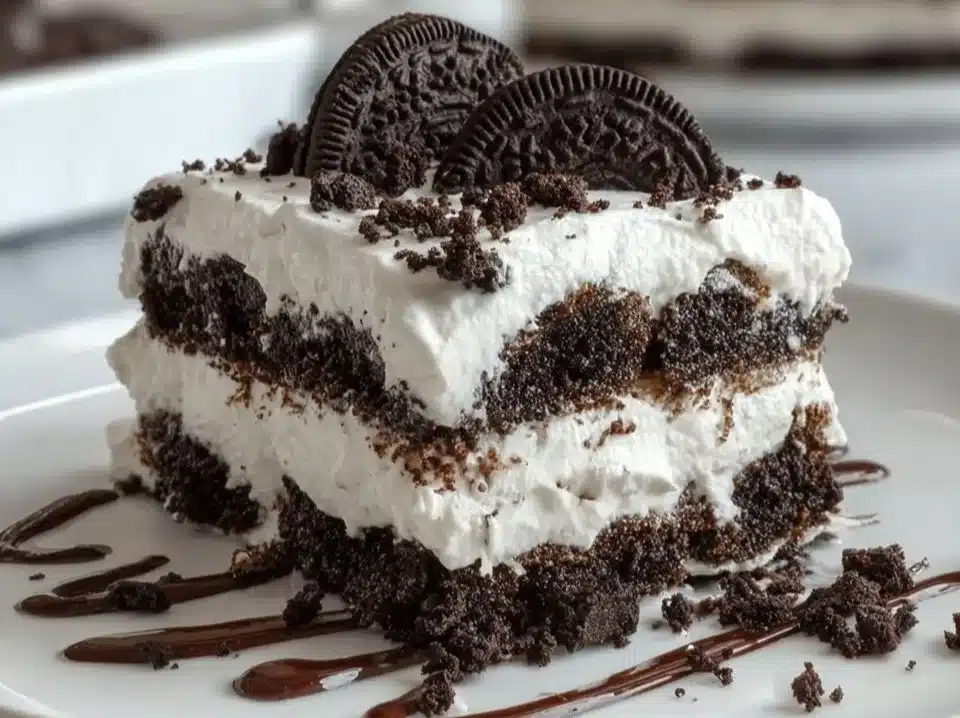
{image_template}
Print
Oreo Icebox Cake
- Total Time: 240 minutes
- Yield: 8 servings 1x
- Diet: Vegetarian
Description
A delightful no-bake dessert that combines creamy layers with iconic Oreo cookies for a refreshing treat.
Ingredients
- 24 Oreo cookies
- 2 cups heavy whipping cream
- 1/4 cup powdered sugar
- 1 tsp vanilla extract
- Optional: Chocolate shavings, crushed Oreos, fresh berries
Instructions
- Whip heavy cream, powdered sugar, and vanilla in a chilled bowl until stiff peaks form. Avoid overwhipping.
- Spread a thin layer of whipped cream in a rectangular dish.
- Place Oreos side by side for the first layer. Press gently to stabilize.
- Spread another layer of whipped cream evenly.
- Repeat cookie and cream layers until finished.
- Top with a final cream layer.
- Cover and refrigerate for at least 240–360 minutes or overnight.
- Garnish with crushed Oreos, chocolate shavings, or berries before slicing. Serve chilled.
Notes
For lower sugar options, consider using sugar substitutes like Stevia, Monk fruit, or Allulose.
- Prep Time: 15 minutes
- Cook Time: 0 minutes
- Category: Dessert
- Method: No-Baking
- Cuisine: American
Nutrition
- Serving Size: 1 serving
- Calories: 350
- Sugar: 20g
- Sodium: 300mg
- Fat: 24g
- Saturated Fat: 14g
- Unsaturated Fat: 8g
- Trans Fat: 0g
- Carbohydrates: 36g
- Fiber: 2g
- Protein: 4g
- Cholesterol: 60mg