Cheez-Its recipe

This post may contain affiliate links.
I’ve always had a soft spot for Cheez-Its, those delightful little snacks that evoke nostalgic memories of school lunches and after-school treats. However, nothing compares to the experience of biting into a fresh, homemade version — crisp, cheesy, and utterly satisfying. Today, I’m excited to share with you my Homemade Cheez-Its Recipe, a simple yet satisfying way to recreate these beloved crackers from the comfort of your own kitchen.
As I embarked on this culinary journey, it was about more than just satisfying a craving. It was about reliving memories of kitchen experiments with my family, who always encouraged my culinary curiosities. The Homemade Cheez-Its Recipe I’ll share today encapsulates that spirit, offering a fun and engaging way to connect with loved ones while creating a scrumptious snack.
Understanding the Magic of Homemade Cheez-Its Recipe
Homemade Cheez-Its represent a kind of comfort food that transcends generations. Originating in the United States, these cheesy bites were first created in the 1920s and have since become a staple in many households. They bring a warmth to any gathering and capture the essence of home-cooked snacks. Making these crackers from scratch allows you to control the ingredients and adjust the flavors to your liking, creating a unique twist on this classic treat.
The warmth of cheese and the richness of butter combined with a slight crunch speak to the heart of what homemade cooking is all about. Making the Homemade Cheez-Its Recipe not only helps you relive childhood memories but also creates new ones to cherish with family and friends.
Why You’ll Love This Homemade Cheez-Its Recipe
- Flavor Explosion: The sharp cheddar cheese lends a robust flavor that will leave you craving more.
- Easy to Make: With just a handful of ingredients, this recipe is straightforward enough for even beginner cooks to tackle with confidence.
- Healthier Alternative: By using fresh ingredients, you can create a snack free from preservatives and unnecessary additives.
- Perfect for Gatherings: These crunchy bites are a crowd-pleaser, making them an ideal addition to any party or movie night.
Who It’s For
- Busy Families: Quick and easy to whip up, perfect for after-school snacking.
- Health-Conscious Cooks: With customizable ingredients, you can make it fit your health goals.
- Beginner Cooks: A simple recipe that builds culinary confidence.
- Cheese Lovers: This recipe is a cheesy delight that you won’t want to miss!
Perfect Moments to Enjoy Homemade Cheez-Its Recipe
- After School Snacks: Delight your little ones with a crunchy, cheesy treat.
- Movie Nights: Elevate your home cinema experience with freshly baked Cheez-Its.
- Casual Gatherings: Impress your friends with homemade snacks at your next get-together.
- Cozy Weeknights: Unwind with a delicious snack while enjoying your favorite series.
How to Make the Perfect Homemade Cheez-Its Recipe
Ready to dive into this delicious creation? Let’s get started!
Ingredients
- 8 ounces sharp cheddar cheese, finely shredded
- 1 cup all-purpose flour
- 4 tablespoons cold unsalted butter, cubed
- 1/2 teaspoon salt
- 1/4 teaspoon paprika
- 1/4 teaspoon garlic powder (optional)
- 2 to 3 tablespoons ice water
Step-by-Step Instructions
- Set your oven to 375°F and line a baking sheet with parchment paper to prevent sticking and ensure even baking.
- Add the shredded cheddar cheese, all-purpose flour, cold cubed butter, salt, paprika, and garlic powder (if using) to a food processor.
- Pulse these ingredients until the mixture resembles coarse crumbs, which helps create the perfect crumbly texture for your dough.
- Gradually add ice water one tablespoon at a time into the food processor, pulsing after each addition until the mixture comes together to form a cohesive dough ball.
- Transfer the dough onto a lightly floured surface and roll it out as thin as possible, about 1/8 inch thick, to achieve the characteristic thin crispiness of Cheez-Its.
- Using a pizza cutter or sharp knife, cut the dough into 1-inch squares.
- Use the tip of a skewer or toothpick to poke a small hole in the center of each square to mimic the classic Cheez-It look.
- Place the cracker squares onto the prepared baking sheet, leaving a small space between each to allow for even cooking.
- Bake in the preheated oven for 12 to 15 minutes or until the edges turn lightly golden and the crackers are crisp.
- Remove the crackers from the oven and let them cool completely on a wire rack to ensure they become extra crunchy before serving.
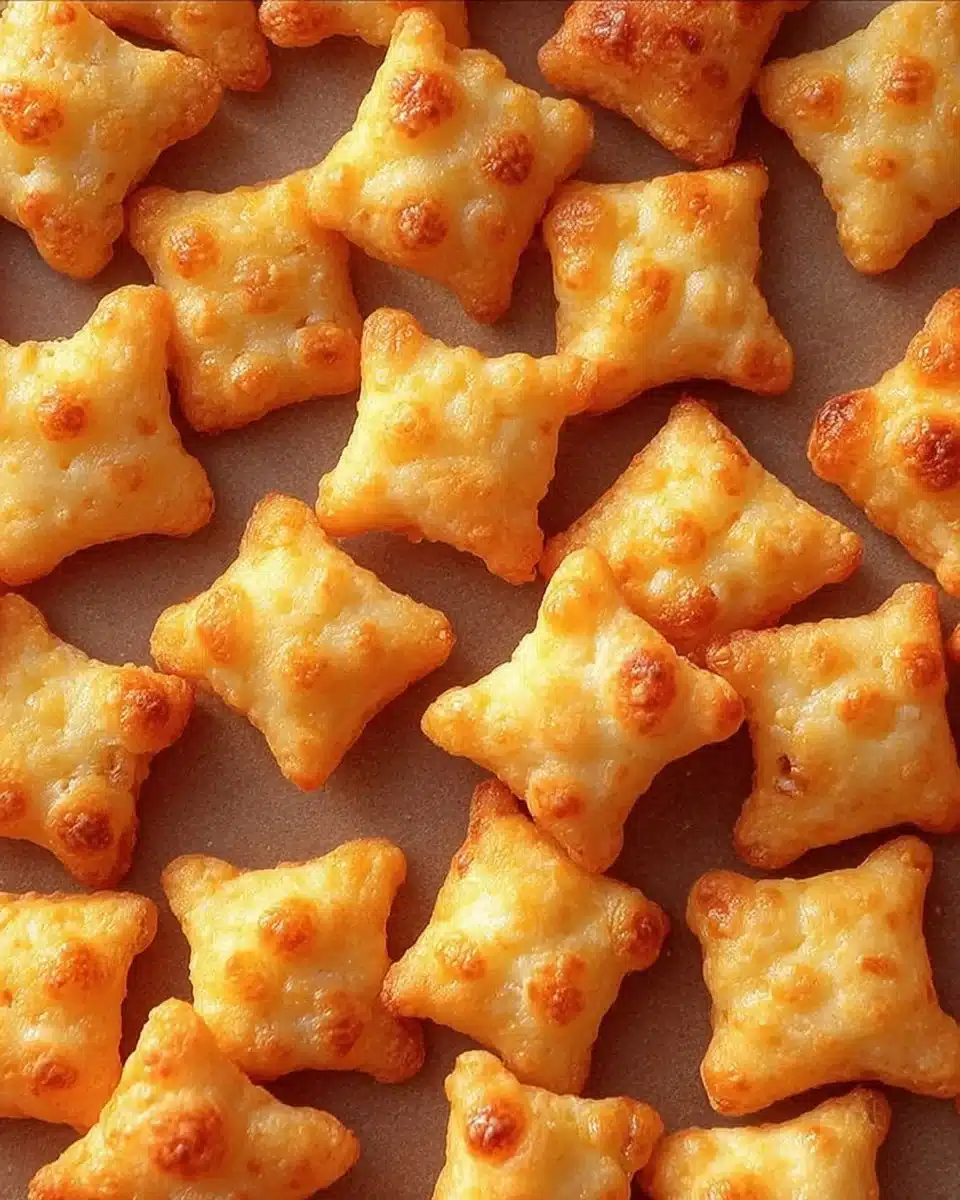
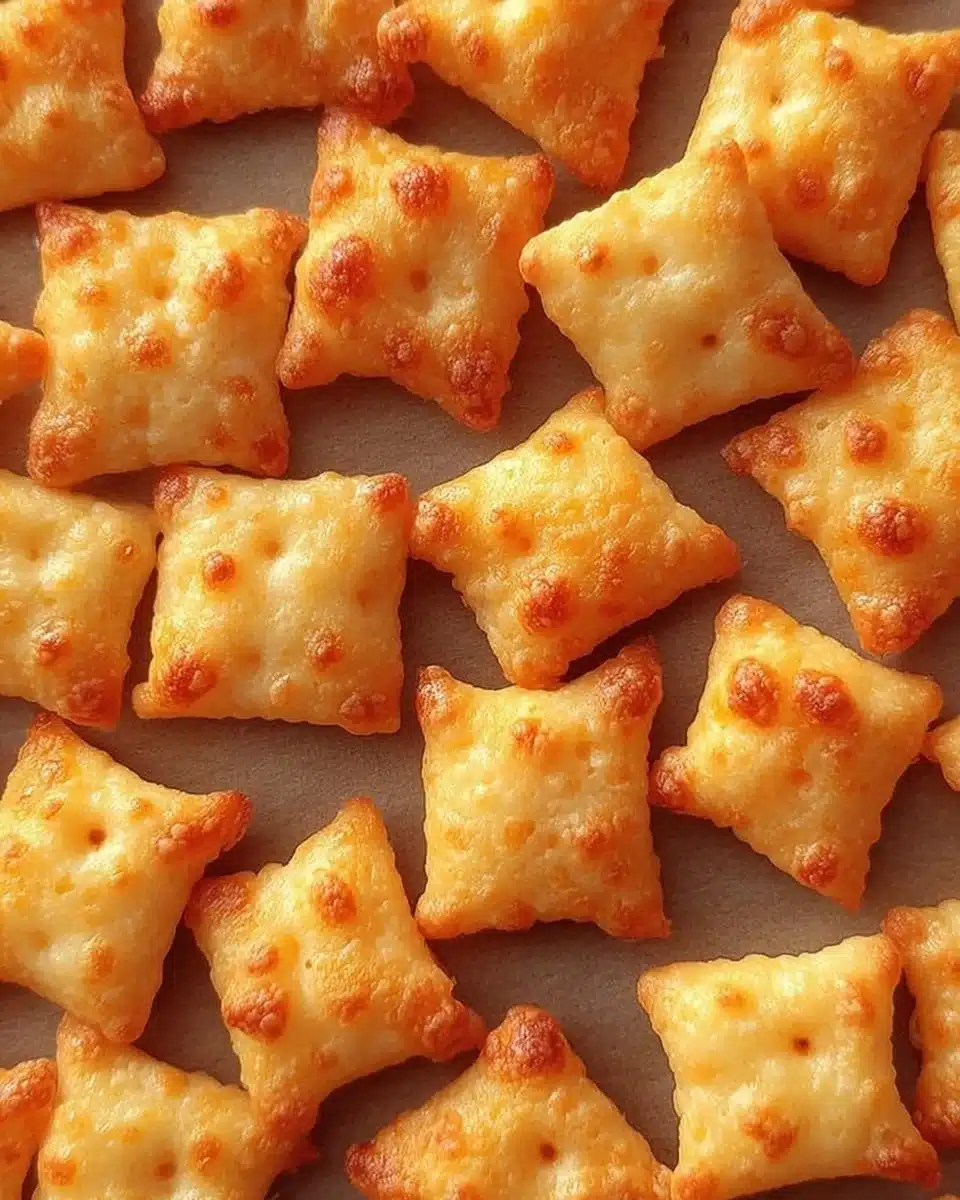
{image_2}
For People with Diabetes: Sugar Substitutes
If you’re looking for sugar-free alternatives, consider options like stevia, monk fruit, or allulose. Avoid using honey or maple syrup as substitutes, as they contain sugar.
Essential Tools for Homemade Cheez-Its Recipe
- Food processor
- Rolling pin
- Pizza cutter or sharp knife
- Baking sheet
- Parchment paper
- Wire rack for cooling
Pro Tips to Elevate Your Homemade Cheez-Its Recipe
- Ensure your butter is very cold when you start; it helps the dough remain flaky.
- Experiment with different cheeses for unique flavors (try gouda or pepper jack!).
- Allow enough space between crackers on your baking sheet to avoid sticking.
How to Store & Reheat Homemade Cheez-Its Recipe
- Fridge: Store in an airtight container for up to one week.
- Freezer: Place in a sealed freezer bag; they can last for up to three months.
- Reheat: Bake in a 350°F oven for a few minutes to bring back crunchiness.
Common Mistakes to Avoid
- Overworking the Dough: It can lead to tough crackers; stop mixing once it forms a dough.
- Not Rolling Thin Enough: These crackers need to be rolled out thin for optimal crunch.
- Skipping the Cooling Step: Cooling on a wire rack ensures they stay crunchy.
FAQs About Homemade Cheez-Its Recipe
Q: Can I use a different type of cheese?
Yes, you can experiment with various cheeses for different flavors.
Q: Are these Cheez-Its gluten-free?
No, this recipe uses all-purpose flour, but you can substitute it with a gluten-free flour mix.
Q: How can I make my Cheez-Its spicier?
It depends on your preference. You can add cayenne pepper or chili powder to the dough for extra heat.
Q: Can I make these ahead of time?
Yes, you can prepare the dough and freeze it until you’re ready to bake.
Q: Do I need to poke holes in the dough?
Yes, it helps them bake evenly and resemble traditional Cheez-Its.
Final Word on This Homemade Cheez-Its Recipe
This Homemade Cheez-Its Recipe is not just a way to enjoy a classic snack; it’s a journey back to simpler times shared with loved ones. I hope you find joy in making these crunchy, cheesy bites as much as I do. Let me know how your experience goes — share your stories or variations in the comments below!
{image_template}
Print
Homemade Cheez-Its
- Total Time: 30 minutes
- Yield: 4 servings 1x
- Diet: Vegetarian
Description
A simple yet satisfying way to recreate homemade Cheez-Its, offering a crisp, cheesy snack that evokes nostalgia.
Ingredients
- 8 ounces sharp cheddar cheese, finely shredded
- 1 cup all-purpose flour
- 4 tablespoons cold unsalted butter, cubed
- 1/2 teaspoon salt
- 1/4 teaspoon paprika
- 1/4 teaspoon garlic powder (optional)
- 2 to 3 tablespoons ice water
Instructions
- Set your oven to 375°F and line a baking sheet with parchment paper.
- Add the shredded cheddar cheese, all-purpose flour, cold cubed butter, salt, paprika, and garlic powder to a food processor.
- Pulse the ingredients until the mixture resembles coarse crumbs.
- Gradually add ice water one tablespoon at a time, pulsing after each addition until a cohesive dough forms.
- Transfer the dough onto a lightly floured surface and roll it out to about 1/8 inch thick.
- Cut the dough into 1-inch squares using a pizza cutter or sharp knife.
- Use a skewer or toothpick to poke a small hole in the center of each square.
- Place the cracker squares onto the prepared baking sheet, leaving space between each square.
- Bake in the preheated oven for 12 to 15 minutes until lightly golden and crisp.
- Remove the crackers from the oven and let them cool on a wire rack.
Notes
Ensure butter is cold to keep the crackers flaky. Experiment with different cheeses for unique flavors.
- Prep Time: 15 minutes
- Cook Time: 15 minutes
- Category: Snack
- Method: Baking
- Cuisine: American
Nutrition
- Serving Size: 1 serving
- Calories: 200
- Sugar: 0g
- Sodium: 400mg
- Fat: 12g
- Saturated Fat: 7g
- Unsaturated Fat: 3g
- Trans Fat: 0g
- Carbohydrates: 10g
- Fiber: 0g
- Protein: 8g
- Cholesterol: 30mg