To create this delightful strawberry Danish, you’ll need the following ingredients:
What is Strawberry Danish?
Why You’ll Love This Strawberry Danish
- 1 package of puff pastry (thawed)
- 1 cup fresh strawberries (sliced)
- 1/4 cup sugar
- 1 tablespoon cornstarch
- 1 teaspoon vanilla extract
- 1 egg (beaten, for egg wash)
- Powdered sugar (for dusting)
Who It’s For
For a richer flavor, consider adding cream cheese to the filling. You can also swap out strawberries for other fruits like blueberries or raspberries, making this a versatile recipe for any season.
When to Cook It
Making your own strawberry Danish is easier than you might think! Follow these simple steps:
How to Make the Perfect Strawberry Danish
Ingredients
- Quick and easy to prepare: With just a few simple steps, you can whip up this delightful treat in no time, making it perfect for busy mornings when you need a delicious breakfast on the table fast.
- Bursting with fresh strawberry flavor: Each bite is a sweet explosion of juicy strawberries, making it a delightful treat for any occasion, whether it’s a casual snack or a special dessert.
- Versatile enough for breakfast or dessert: This strawberry Danish appeals to all ages, making it a fantastic choice for family gatherings or a sweet surprise for your loved ones.
- Uses simple ingredients: You likely already have the ingredients at home, which means you can create this bakery-style pastry without a trip to the store.
- Impresses without the fuss: The beautiful golden finish and flaky layers will make you feel like a professional baker, even if you’re just starting out!
Step-by-Step Instructions
- Preheat your oven to 400°F (200°C).
- Prepare the filling: In a bowl, mix the sliced strawberries, sugar, cornstarch, and vanilla extract until well combined. The aroma of fresh strawberries will fill your kitchen!
- Roll out the puff pastry: On a floured surface, roll out the puff pastry and cut it into squares. Aim for about 4×4 inches for each square.
- Fill the pastry: Place a spoonful of the strawberry mixture in the center of each pastry square. Don’t overfill, or they might burst!
- Seal the edges: Fold the corners of the pastry over the filling to create a pocket and seal the edges tightly.
- Brush with egg wash: Brush the tops with the beaten egg for a golden finish that will make your Danish shine.
- Bake: Place the pastries on a baking sheet lined with parchment paper and bake in the preheated oven for 15-20 minutes or until golden brown.
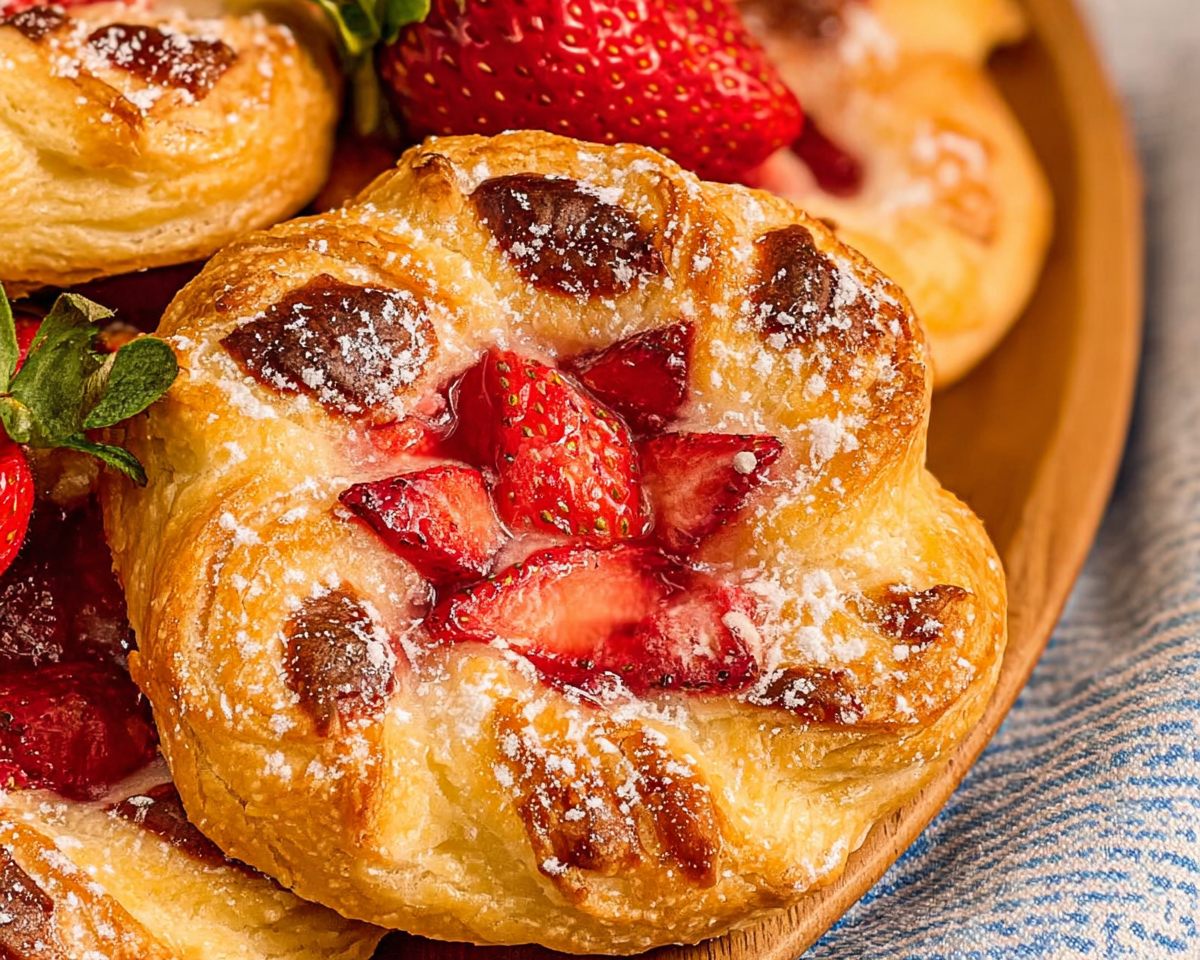
- Cool and dust: Let cool slightly, then dust with powdered sugar before serving. The sight of these golden pastries will make your heart sing!
For People with Diabetes: Sugar Substitutes
If you’re looking to make this strawberry Danish a bit healthier, consider using sugar substitutes like stevia or erythritol. These options can provide sweetness without the calories of traditional sugar. However, I advise against using sweeteners like honey or maple syrup, as they can significantly increase the sugar content of your pastry.
To make your strawberry Danish a success, having the right tools on hand is essential. Here’s a list of the kitchen essentials you’ll need:
Tools You’ll Need
- Baking sheet: A sturdy baking sheet is crucial for even baking and to catch any drips from your pastries.
- Parchment paper: Line your baking sheet with parchment paper to prevent sticking and make cleanup a breeze.
- Rolling pin: A rolling pin will help you roll out the puff pastry to the perfect thickness for your Danish.
- Mixing bowls: Use mixing bowls to combine your strawberry filling and keep your ingredients organized.
- Pastry brush: A pastry brush is perfect for applying the egg wash, giving your Danish that beautiful golden finish.
Top Tips from Well-Known Chefs
- Master the Lamination: Chef Thomas Keller emphasizes the importance of proper lamination in puff pastry. He suggests ensuring that your butter is at the right temperature—cold but pliable—so that it creates those beautiful flaky layers. If the butter is too soft, it will blend into the dough instead of creating distinct layers.
- Chill Your Dough: Chef Julia Child always advised chilling your dough between folds. This not only helps maintain the butter’s integrity but also makes the dough easier to work with. A well-chilled dough will puff up beautifully in the oven, resulting in that signature airy texture.
- Experiment with Flavors: Renowned pastry chef Dominique Ansel encourages bakers to get creative with their fillings. While strawberries are delightful, consider adding a hint of lemon zest or a splash of almond extract to your filling for an unexpected flavor twist that will surprise your taste buds.
- Don’t Skip the Egg Wash: Chef Ina Garten swears by the egg wash for achieving that golden, glossy finish. She recommends brushing the pastries gently but thoroughly, ensuring every corner is covered for a stunning presentation.
- Use Fresh Ingredients: Chef Alice Waters always emphasizes the importance of using fresh, high-quality ingredients. For your strawberry Danish, opt for ripe, in-season strawberries. Their natural sweetness and vibrant flavor will shine through in your pastries.
Storing and Reheating Tips
- Berry Medley: Instead of just strawberries, mix in other berries like blueberries or raspberries for a vibrant and colorful filling. The combination of sweet and tart flavors will create a delightful burst in every bite.
- Cinnamon Apple Danish: Swap out the strawberries for thinly sliced apples and add a sprinkle of cinnamon and nutmeg to the filling. This warm, spiced version is perfect for fall and will fill your kitchen with a cozy aroma.
- Peach and Cream Cheese: For a richer filling, combine fresh peaches with cream cheese. The creamy texture pairs beautifully with the juicy peaches, creating a decadent treat that’s perfect for summer.
- Chocolate Hazelnut: If you’re a chocolate lover, try spreading a layer of chocolate hazelnut spread on the pastry before adding your fruit filling. The combination of chocolate and strawberries is a match made in heaven!
- Almond Joy Danish: Add a touch of almond extract to your strawberry filling and sprinkle some toasted almonds on top before baking. This nutty twist will elevate your Danish to a whole new level.
Common Mistakes to Avoid
- Keep Everything Cold: The secret to flaky pastry lies in keeping your ingredients cold. Make sure your butter and puff pastry are chilled before you start. If the butter melts into the dough, you won’t get those beautiful layers. I often pop my mixing bowl and utensils in the fridge for a few minutes before starting.
- Don’t Overwork the Dough: When rolling out your puff pastry, handle it gently. Overworking the dough can lead to tough pastries instead of the light, airy texture we’re aiming for. Roll it out just enough to achieve the desired thickness, and remember, less is more!
- Use a Sharp Knife: When cutting your pastry into squares, use a sharp knife or a pizza cutter. This will ensure clean edges, which helps the pastry rise evenly. Dull blades can crush the layers, affecting the final texture.
- Egg Wash for Shine: Don’t skip the egg wash! Brushing the tops of your pastries with a beaten egg before baking gives them that gorgeous golden color and a beautiful shine. It’s the finishing touch that makes your Danish look professional.
- Watch the Baking Time: Every oven is different, so keep an eye on your pastries as they bake. You want them to be golden brown and puffed up, which usually takes about 15-20 minutes. If they’re browning too quickly, you can cover them loosely with aluminum foil to prevent burning.
- Let Them Cool: After baking, allow your strawberry Danish to cool slightly on a wire rack. This helps maintain their flaky texture and prevents them from becoming soggy. Plus, it’s hard to resist the aroma wafting through your kitchen!
FAQs About Strawberry Danish
- In the Refrigerator: If you have leftover strawberry Danish, place them in an airtight container or wrap them tightly in plastic wrap. They can be stored in the fridge for up to 3 days. This will help maintain their freshness and prevent them from drying out.
- In the Freezer: For longer storage, you can freeze your strawberry Danish. Wrap each pastry individually in plastic wrap, then place them in a freezer-safe bag or container. They can be frozen for up to 2 months. Just make sure to label the container with the date so you can keep track!
Conclusion: Final Thoughts on Strawberry Danish
When it’s time to enjoy your leftover strawberry Danish, reheating them properly is key to preserving their flaky texture and delicious flavor:
By following these storing and reheating tips, you can enjoy your strawberry Danish even after the initial bake, savoring the delightful flavors and textures that make this pastry so special!
As you embark on your journey to create the perfect strawberry Danish, here are some additional clarifications and tips to ensure your baking experience is smooth and enjoyable:
The Danish pastry has a rich history that reflects the blending of cultures. Originally influenced by Austrian baking techniques, Danish pastries have become a staple in many countries, each adding its unique twist. In Denmark, these pastries are often enjoyed with coffee during “kaffepause,” a cherished tradition of taking a break to savor good food and company. By making your own strawberry Danish, you’re not just baking; you’re participating in a global culinary tradition that celebrates creativity and connection through food.
With these helpful notes, you’ll be well-equipped to create a delicious strawberry Danish that not only tastes amazing but also carries a piece of culinary history into your home kitchen!
As you embark on your journey to create the perfect strawberry Danish, it’s essential to be aware of some common pitfalls that can affect the outcome of your delicious pastries. Here are the key mistakes to avoid:
By being mindful of these common mistakes, you’ll be well on your way to creating strawberry Danish pastries that are not only visually appealing but also bursting with flavor and texture. Happy baking!
As you dive into making your own strawberry Danish, you might have a few questions. Here are some frequently asked questions to help guide you:
As I reflect on the joy of making strawberry Danish, I’m reminded of the warmth and connection that comes from sharing homemade treats with loved ones. There’s something truly special about gathering around the table, the aroma of freshly baked pastries filling the air, and watching as everyone’s faces light up with delight at the first bite. It’s in these moments that we create lasting memories, bonding over the simple pleasure of good food.
I encourage you to try this strawberry Danish recipe in your own kitchen. Whether it’s for a weekend brunch, a special occasion, or just because you want to treat yourself, this easy puff pastry dessert is sure to bring smiles to your family’s faces. Don’t hesitate to experiment with different fillings and flavors, making it your own and adding your personal touch.
Once you’ve baked your strawberry Danish, I would love to hear about your experience! Share your thoughts, tips, and any variations you tried in the comments below. Let’s celebrate the joy of baking together and inspire each other to create delicious memories in our kitchens!
Print
Strawberry Danish Delight
- Total Time: 35 minutes
- Yield: 8 servings 1x
- Diet: Vegetarian
Description
A delightful and easy-to-make strawberry Danish pastry that is perfect for breakfast or dessert.
Ingredients
- 1 package of puff pastry (thawed)
- 1 cup fresh strawberries (sliced)
- 1/4 cup sugar
- 1 tablespoon cornstarch
- 1 teaspoon vanilla extract
- 1 egg (beaten, for egg wash)
- Powdered sugar (for dusting)
Instructions
- Preheat your oven to 400°F (200°C).
- In a bowl, mix the sliced strawberries, sugar, cornstarch, and vanilla extract until well combined.
- Roll out the puff pastry on a floured surface and cut it into squares.
- Place a spoonful of the strawberry mixture in the center of each pastry square.
- Fold the corners of the pastry over the filling to create a pocket and seal the edges.
- Brush the tops with the beaten egg for a golden finish.
- Bake in the preheated oven for 15-20 minutes or until golden brown.
- Let cool slightly, then dust with powdered sugar before serving.
Discover my favorite kitchen tools I always use.
Notes
- For a richer flavor, add cream cheese to the filling.
- Can be made with other fruits like blueberries or raspberries.
- Best served warm or at room temperature.
- Prep Time: 15 minutes
- Cook Time: 20 minutes
- Category: Dessert
- Method: Baking
- Cuisine: American
Nutrition
- Serving Size: 1 Danish
- Calories: 250
- Sugar: 10g
- Sodium: 150mg
- Fat: 12g
- Saturated Fat: 5g
- Unsaturated Fat: 5g
- Trans Fat: 0g
- Carbohydrates: 30g
- Fiber: 1g
- Protein: 3g
- Cholesterol: 30mg