Introduction to Halloween Trifle
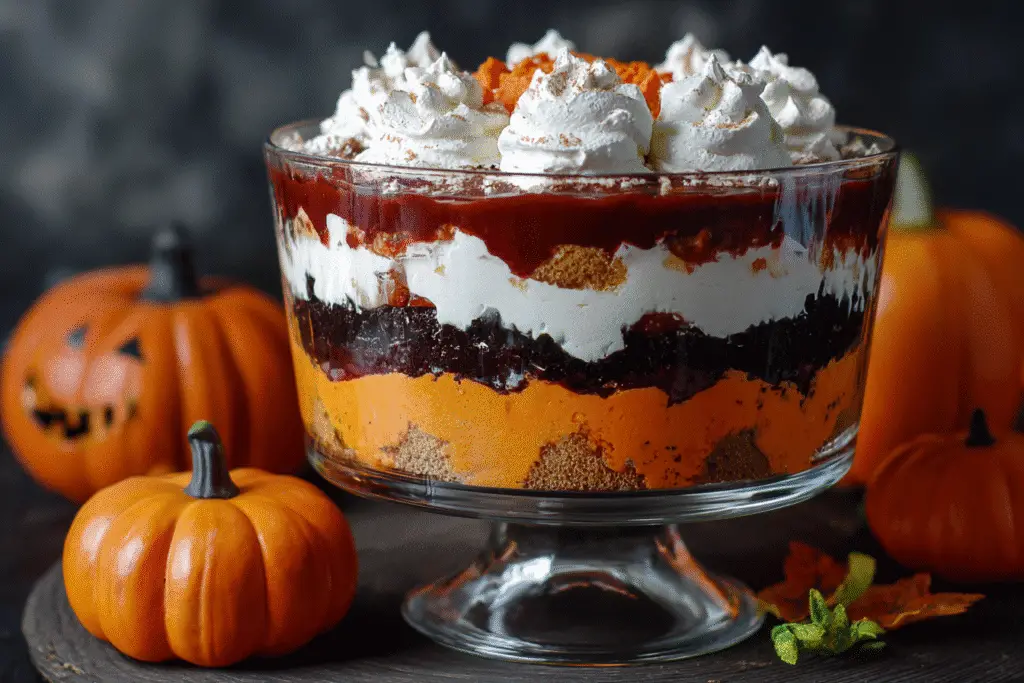
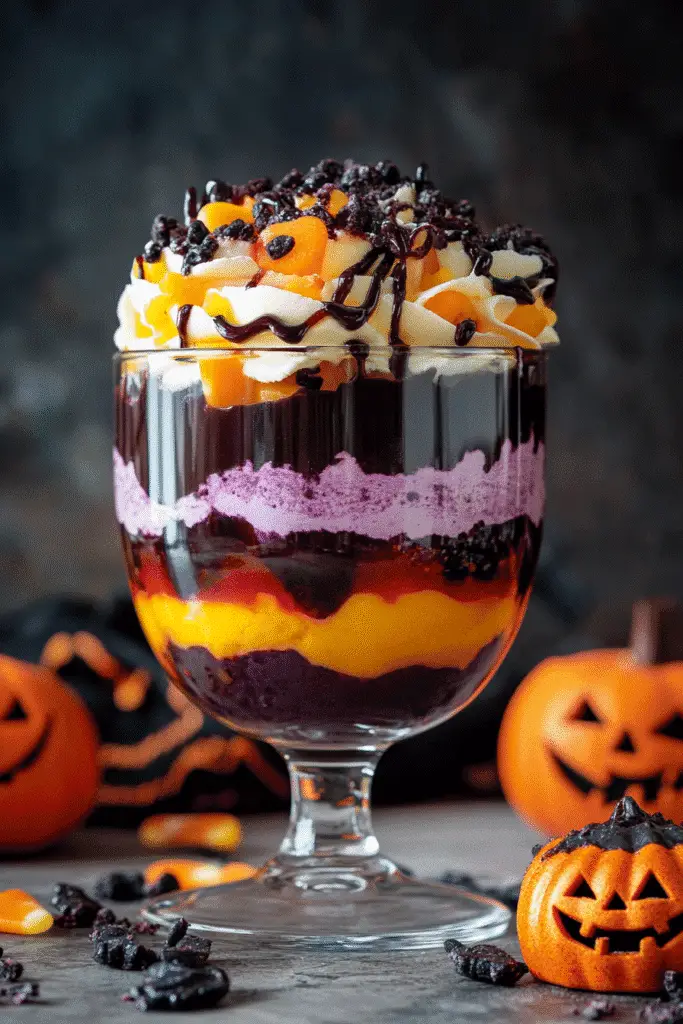
As the leaves turn and the air gets crisp, I find myself drawn to the kitchen, ready to whip up something special for Halloween. This year, I’m excited to share my favorite treat: the Halloween Trifle. Imagine layers of creamy chocolate pudding, fluffy whipped topping, and crunchy Oreos, all topped with vibrant green jello and playful gummy worms. It’s a dessert that not only looks enchanting but also tastes like a dream! Each spoonful is a delightful mix of textures and flavors, making this Halloween Trifle a showstopper at any gathering.
What is Halloween Trifle?
The Halloween Trifle is a delightful twist on the classic British dessert known simply as trifle. Traditionally, trifles are layered desserts made with sponge cake, custard, fruit, and whipped cream. However, as I’ve discovered through my culinary adventures, the Halloween Trifle takes this concept to a whole new level, infusing it with the playful spirit of the holiday.
Originating from England, trifles have been enjoyed since the 16th century, evolving over time to include various flavors and ingredients. The Halloween version embraces the festive season by incorporating spooky elements like gummy worms and candy corn, making it a fun and interactive dessert for all ages. This layered dessert not only satisfies your sweet tooth but also serves as a canvas for creativity, allowing you to customize it with your favorite treats.
As I prepare this Halloween Trifle, I can’t help but think of the joy it brings to my family gatherings. The vibrant colors and whimsical decorations evoke a sense of nostalgia, reminding me of the Halloween parties I attended as a child. With each layer, I’m reminded of the importance of sharing food that brings people together, creating memories that last a lifetime. So, whether you’re hosting a spooky soirée or simply looking to indulge in a festive treat, this Halloween Trifle is sure to enchant everyone at your table!
Why You’ll Love This Halloween Trifle
- Convenient Layers: This Halloween Trifle is a breeze to assemble, making it perfect for busy cooks. Just layer and chill!
- Irresistible Flavor: The combination of rich chocolate pudding, fluffy whipped topping, and crunchy Oreos creates a symphony of taste that will delight your palate.
- Healthier Indulgence: With options to swap ingredients, you can make this dessert a bit lighter without sacrificing flavor, appealing to health-conscious families.
- Family-Friendly Fun: Kids love the playful elements like gummy worms and candy corn, making it a hit for family gatherings and Halloween parties.
- Customizable Delight: You can easily adapt the layers to suit your family’s preferences, ensuring everyone gets a taste they love!
Who It’s For
This Halloween Trifle is perfect for busy families looking for a fun and festive dessert that everyone can enjoy. It’s also great for health-conscious cooks who want to indulge without the guilt. Food lovers will appreciate the creative layering and the opportunity to customize flavors, making it a delightful treat for all ages!
When to Cook It
Whether you’re hosting a Halloween party, celebrating a family gathering, or simply want to add a festive touch to your weeknight dessert, this Halloween Trifle is the ideal choice. It’s a showstopper for any occasion, bringing joy and sweetness to your celebrations!
How to Make the Perfect Halloween Trifle
Ingredients
- 1 package of chocolate pudding mix: This is the rich base of your trifle, providing a creamy texture and deep flavor.
- 2 cups of milk: Essential for preparing the pudding; you can use almond or oat milk for a dairy-free option.
- 1 package of whipped topping: Adds a light, fluffy layer; consider using coconut whipped cream for a vegan twist.
- 1 cup of crushed Oreos: These bring a delightful crunch and chocolatey flavor; feel free to swap with gluten-free cookies if needed.
- 1 cup of gummy worms: A fun, spooky touch that kids adore; you can substitute with chocolate-covered raisins for a healthier option.
- 1 cup of candy corn: Adds a pop of color and sweetness; use seasonal sprinkles for a different look.
- 1 cup of green jello: This layer adds a vibrant color and a fruity flavor; you can use any flavor of jello you prefer.
- 1 cup of vanilla cake cubes: These provide a soft, sweet layer; chocolate cake cubes can be a delicious alternative.
Step-by-Step Instructions
- Start by preparing the chocolate pudding according to the package instructions. Let it set in the fridge for about 5 minutes until it thickens.
- In a large trifle bowl, layer half of the chocolate pudding at the bottom. The rich aroma will fill your kitchen!
- Add a layer of vanilla cake cubes on top of the pudding, creating a soft, sweet foundation.
- Spread a generous layer of whipped topping over the cake cubes, making it fluffy and inviting.
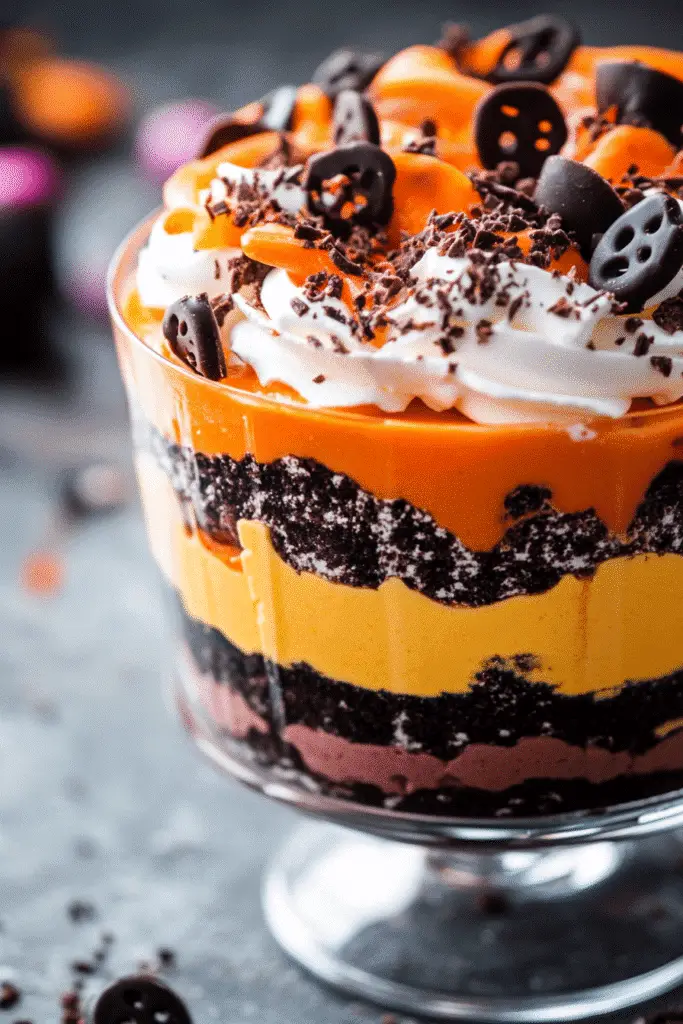
- Sprinkle a layer of crushed Oreos over the whipped topping, adding a delightful crunch that contrasts beautifully with the creaminess.
- Next, add a layer of green jello on top of the Oreos. The vibrant color will make your trifle pop!
- Repeat the layers until all ingredients are used, finishing with a thick layer of whipped topping on top.
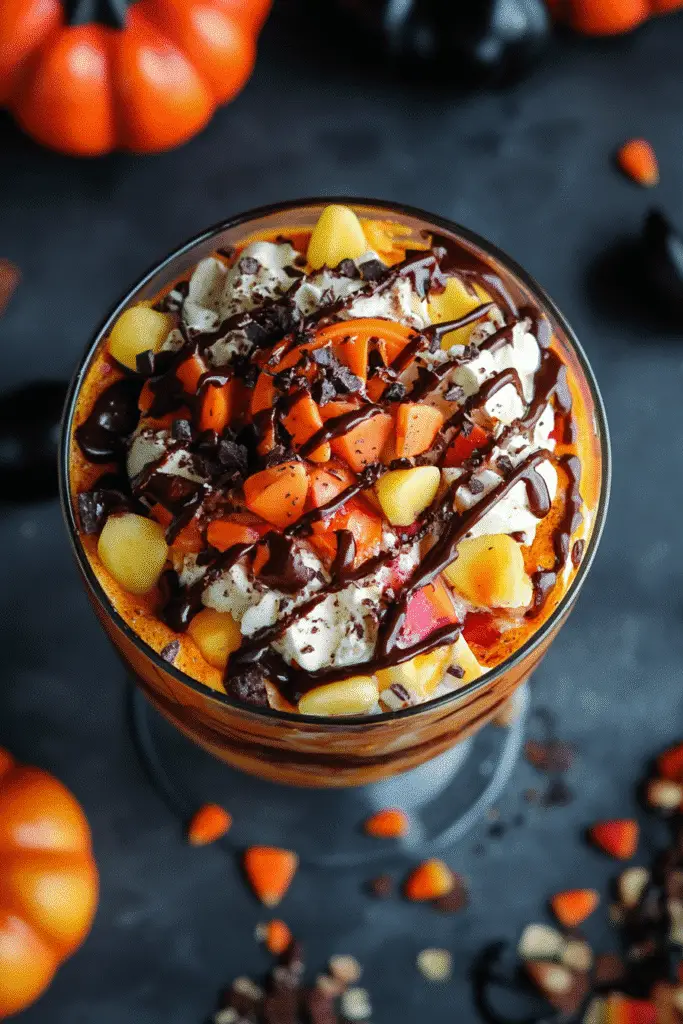
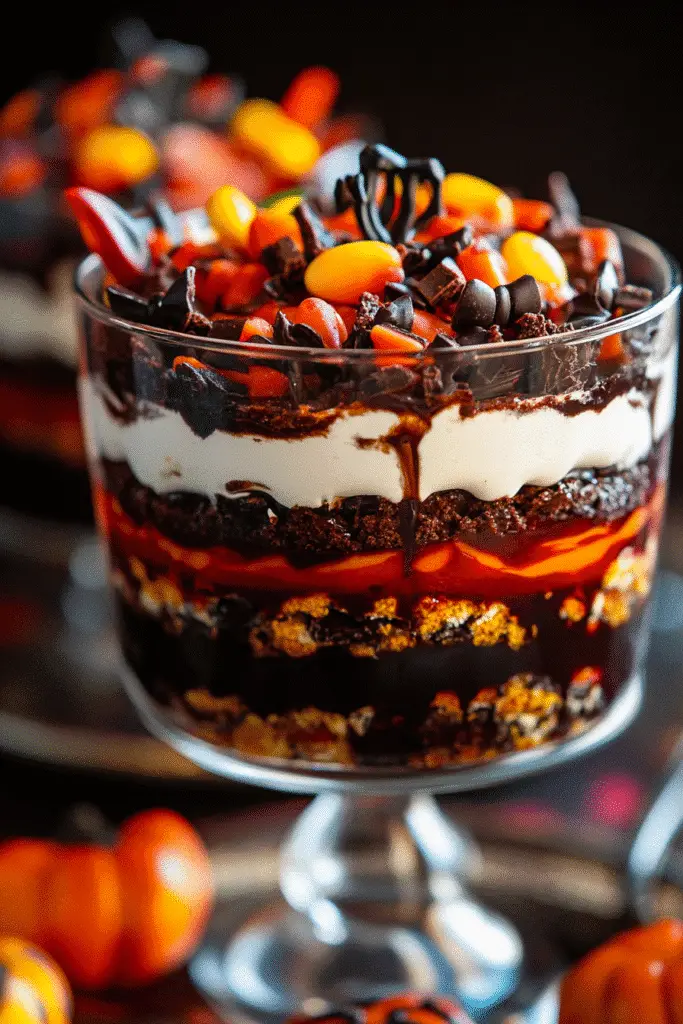
- For the grand finale, decorate the top with gummy worms and candy corn, creating a spooky effect that will enchant everyone.
- Chill the trifle in the fridge for at least 2 hours before serving to allow the flavors to meld together.
For People with Diabetes: Sugar Substitutes
If you’re looking for sugar substitutes, consider using stevia, monk fruit, erythritol, or allulose. These options provide sweetness without the calories. Avoid using honey or maple syrup, as they can spike blood sugar levels.
Tools You’ll Need
- Trifle Bowl: A clear glass bowl is ideal for showcasing the beautiful layers. If you don’t have one, any large glass or ceramic bowl will work.
- Mixing Bowls: Use medium-sized bowls for preparing the pudding and mixing other ingredients. A set of nesting bowls is perfect for saving space.
- Whisk or Electric Mixer: A whisk is great for mixing the pudding by hand, but an electric mixer can save time and ensure a smooth consistency.
- Spatula: A rubber spatula is essential for spreading the whipped topping evenly and scraping down the sides of your mixing bowls.
- Measuring Cups and Spoons: Accurate measurements are key to achieving the perfect balance of flavors in your Halloween Trifle.
- Chilling Container: If your trifle bowl doesn’t fit in the fridge, have a large airtight container ready to store your trifle while it chills.
Tips from Well-Known Chefs
Creating the perfect Halloween Trifle can be a delightful experience, especially when you incorporate some expert tips from renowned chefs. Here are a few hacks that I’ve gathered over the years to elevate your spooky dessert:
- Layering Technique: Chef Ina Garten suggests starting with the heaviest ingredients at the bottom. This ensures stability and prevents the lighter layers from sinking. For your Halloween Trifle, begin with the chocolate pudding and follow with the cake cubes.
- Flavor Infusion: Celebrity chef Gordon Ramsay recommends adding a splash of vanilla extract to your whipped topping for an extra layer of flavor. This simple addition can enhance the overall taste of your trifle.
- Chill Time: Pastry chef Dominique Ansel emphasizes the importance of chilling your trifle for at least 4 hours. This allows the flavors to meld beautifully, creating a more cohesive taste experience.
- Garnishing Tips: Renowned baker Martha Stewart advises using fresh fruit or edible flowers as a garnish for a pop of color. While gummy worms and candy corn are fun, consider adding some fresh raspberries or mint leaves for a sophisticated touch.
- Texture Play: Chef Thomas Keller suggests incorporating different textures to keep each bite interesting. Consider adding a layer of crushed pretzels or nuts for a salty crunch that contrasts with the sweetness of the trifle.
By following these chef-approved tips, you’ll not only impress your guests but also create a Halloween Trifle that’s bursting with flavor and creativity. Happy layering!
Delicious Variations to Customize Your Spooky Dessert
One of the best things about the Halloween Trifle is its versatility. You can easily customize it to suit different tastes, dietary needs, or even seasonal themes. Here are some delightful variations to inspire your creativity:
- Chocolate Lovers Delight: Swap the vanilla cake cubes for chocolate cake cubes to intensify the chocolate flavor. You can also add a layer of chocolate ganache between the pudding and cake for an extra indulgent touch.
- Fruity Twist: Incorporate layers of fresh fruit like sliced strawberries, bananas, or blueberries. This not only adds a burst of color but also a refreshing contrast to the rich chocolate and creamy layers.
- Vegan Version: Use plant-based whipped cream and dairy-free chocolate pudding. You can make your own pudding using almond milk and cornstarch for a creamy texture without any animal products.
- Gluten-Free Option: Substitute regular Oreos with gluten-free cookies and use a gluten-free cake mix for the cake cubes. This way, everyone can enjoy the spooky treat without worry!
- Spiced Pumpkin Layer: For a fall-inspired twist, add a layer of pumpkin puree mixed with cinnamon and nutmeg. This will give your trifle a warm, cozy flavor that’s perfect for the season.
- Nutty Crunch: Add a layer of chopped nuts, such as pecans or walnuts, for a delightful crunch. This will enhance the texture and add a nutty flavor that complements the sweetness of the trifle.
Feel free to mix and match these variations to create a Halloween Trifle that reflects your personal taste and dietary preferences. The possibilities are endless, and each layer can tell a different story, making your dessert not just a treat but a memorable experience!
Top Tips for Perfecting Your Halloween Trifle
Creating a stunning Halloween Trifle is not just about layering ingredients; it’s about crafting an experience that delights the senses. Here are some expert techniques and cooking hacks that I’ve gathered over the years to ensure your trifle is a showstopper:
- Chill Your Ingredients: Before you start layering, chill your pudding and whipped topping. This helps maintain the structure of your trifle and keeps it from becoming too runny.
- Use Clear Bowls: A clear trifle bowl or glass dish allows everyone to admire the beautiful layers. The visual appeal is just as important as the taste, especially for a festive dessert like this!
- Layer Strategically: Start with heavier ingredients at the bottom, like chocolate pudding, and finish with lighter ones, such as whipped topping. This prevents the layers from mixing and keeps your trifle looking pristine.
- Incorporate Flavorful Syrups: Drizzle a bit of chocolate or caramel syrup between layers for an extra burst of flavor. This adds depth and richness to each bite.
- Experiment with Textures: Mix in different textures by adding crushed cookies, nuts, or even granola. This not only enhances the flavor but also makes each spoonful exciting.
- Garnish Creatively: Use seasonal decorations like edible glitter, spooky sprinkles, or fresh mint leaves to elevate the presentation. A little creativity goes a long way in making your trifle stand out.
- Let It Rest: Allow your trifle to chill for at least 2 hours, but overnight is even better. This resting time lets the flavors meld beautifully, creating a more harmonious dessert.
- Personal Touch: Don’t hesitate to add your own twist! Whether it’s a favorite candy, a family recipe for cake, or a unique flavor of jello, personalizing your trifle makes it even more special.
By incorporating these tips, you’ll not only enhance the flavor and presentation of your Halloween Trifle but also create a memorable dessert that your family and friends will rave about. Happy layering!
Storing and Reheating Tips
Once you’ve created your stunning Halloween Trifle, you might be wondering how to store it properly to maintain its deliciousness. Here are some clear and practical tips for storing your trifle, whether you have leftovers or want to prepare it in advance:
- Refrigeration: If you plan to enjoy your Halloween Trifle within a few days, simply cover it with plastic wrap or a lid and store it in the refrigerator. It will stay fresh for up to 3 days. The flavors will continue to meld, making it even more delightful!
- Freezing: While I don’t recommend freezing the entire trifle, you can freeze individual layers, like the chocolate pudding or cake cubes, separately. Just be aware that the texture of the whipped topping and jello may change once thawed.
- Assembling Ahead of Time: If you want to prepare your trifle in advance, consider making the layers separately and assembling them the day you plan to serve. This way, the whipped topping remains fluffy, and the layers stay distinct.
- Serving Leftovers: When serving leftovers, give the trifle a gentle stir to redistribute the layers if they have settled. This will help revive its visual appeal and ensure every bite is as delicious as the first!
By following these storing and reheating tips, you can enjoy your Halloween Trifle for days to come, ensuring that every spoonful is just as enchanting as the first. Happy indulging!
Helpful Notes
As you embark on creating your Halloween Trifle, here are some extra clarifications and tips to ensure your dessert turns out perfectly:
- Ingredient Prep: Make sure to prepare your chocolate pudding and green jello ahead of time. Allow the pudding to set in the fridge for at least 5 minutes, and prepare the jello according to package instructions, letting it cool completely before layering.
- Substitutions: If you’re looking to make this dessert gluten-free, opt for gluten-free cookies instead of Oreos and a gluten-free cake mix. For a dairy-free version, use almond or coconut milk for the pudding and a plant-based whipped topping.
- Cultural References: The trifle has a rich history, originating from England, where it was traditionally made with layers of sponge cake, custard, and fruit. The Halloween Trifle is a playful adaptation that embraces the festive spirit of the holiday, allowing for creativity and fun in the kitchen.
- Layering Tips: When layering, try to use a spatula to spread the whipped topping evenly. This will help maintain the distinct layers and prevent them from mixing together.
- Flavor Enhancements: Consider adding a splash of vanilla extract to your pudding for an extra depth of flavor. You can also mix in a bit of cocoa powder to the whipped topping for a chocolatey twist.
- Presentation: For a more dramatic presentation, consider using a clear glass trifle bowl. This allows the beautiful layers to shine through, making your Halloween Trifle not just delicious but visually stunning as well.
With these helpful notes, you’ll be well-equipped to create a Halloween Trifle that’s not only delicious but also a feast for the eyes. Enjoy the process and have fun with your spooky creation!
Common Mistakes to Avoid
- Skipping the Chill Time: One of the biggest mistakes is not allowing your Halloween Trifle to chill for at least 2 hours. This step is crucial for the flavors to meld and for the layers to set properly.
- Overmixing the Whipped Topping: Be gentle when folding in the whipped topping. Overmixing can deflate the airiness, resulting in a denser texture that doesn’t have the light, fluffy quality we love in a trifle.
- Not Layering Properly: Avoid mixing the layers together. Start with heavier ingredients at the bottom and lighter ones on top to maintain distinct layers. This keeps your trifle visually appealing and ensures each bite has a balanced flavor.
- Using Warm Ingredients: Make sure all your ingredients, especially the pudding and jello, are completely cooled before layering. Warm ingredients can cause the whipped topping to melt and the layers to blend together.
- Neglecting to Customize: Don’t be afraid to get creative! Sticking strictly to the recipe can limit your trifle’s potential. Experiment with different flavors, textures, and toppings to make it uniquely yours.
FAQs About Halloween Trifle
Q: Can I make Halloween Trifle ahead of time?
Yes, you can prepare the layers in advance and assemble the trifle the day you plan to serve it. This helps keep the whipped topping fluffy and the layers distinct.
Q: Is Halloween Trifle suitable for vegetarians?
Yes, this Halloween Trifle is vegetarian-friendly, as it uses ingredients like chocolate pudding mix, whipped topping, and cake cubes that do not contain meat or animal by-products.
Q: Can I customize the ingredients in my Halloween Trifle?
It depends on your preferences! You can easily swap ingredients like cake flavors, jello types, or even toppings to create a version that suits your taste or dietary needs.
Q: Is Halloween Trifle a good dessert for kids?
Yes, kids love the fun and colorful layers of Halloween Trifle, especially with playful elements like gummy worms and candy corn, making it a hit at Halloween parties!
Q: Can I use sugar substitutes in my Halloween Trifle?
Yes, you can use sugar substitutes like stevia or monk fruit to make a lower-sugar version of your Halloween Trifle, making it suitable for those watching their sugar intake.
Conclusion: Final Thoughts on Halloween Trifle
As I reflect on the joy that my Halloween Trifle brings to my family and friends, I’m reminded of how food has the power to create lasting memories. This spooktacular dessert is not just about the layers of flavor; it’s about the laughter, the stories shared, and the smiles around the table. I encourage you to try making this Halloween Trifle and let your creativity shine. Don’t forget to share your own twists and experiences in the comments below! Let’s celebrate the magic of cooking together this Halloween season!
Print
Halloween Trifle
- Total Time: 2 hours 30 minutes
- Yield: 8 servings 1x
- Diet: Vegetarian
Description
Discover how to create a spooktacular layered dessert that will enchant everyone!
Ingredients
- 1 package of chocolate pudding mix
- 2 cups of milk
- 1 package of whipped topping
- 1 cup of crushed Oreos
- 1 cup of gummy worms
- 1 cup of candy corn
- 1 cup of green jello
- 1 cup of vanilla cake cubes
Instructions
- Prepare the chocolate pudding according to package instructions and let it set.
- In a large trifle bowl, layer half of the chocolate pudding at the bottom.
- Add a layer of vanilla cake cubes on top of the pudding.
- Spread a layer of whipped topping over the cake cubes.
- Sprinkle a layer of crushed Oreos over the whipped topping.
- Add a layer of green jello on top of the Oreos.
- Repeat the layers until all ingredients are used, finishing with whipped topping on top.
- Decorate the top with gummy worms and candy corn for a spooky effect.
Notes
- For a more intense flavor, consider adding a layer of chocolate cake instead of vanilla.
- Make sure to chill the trifle for at least 2 hours before serving to allow the flavors to meld.
- Feel free to customize the toppings based on your Halloween theme.
- Prep Time: 30 minutes
- Cook Time: 0 minutes
- Category: Dessert
- Method: Layering
- Cuisine: American
Nutrition
- Serving Size: 1 cup
- Calories: 350
- Sugar: 25g
- Sodium: 150mg
- Fat: 15g
- Saturated Fat: 8g
- Unsaturated Fat: 5g
- Trans Fat: 0g
- Carbohydrates: 50g
- Fiber: 2g
- Protein: 5g
- Cholesterol: 30mg
Keywords: Halloween Trifle, layered dessert, spooky dessert