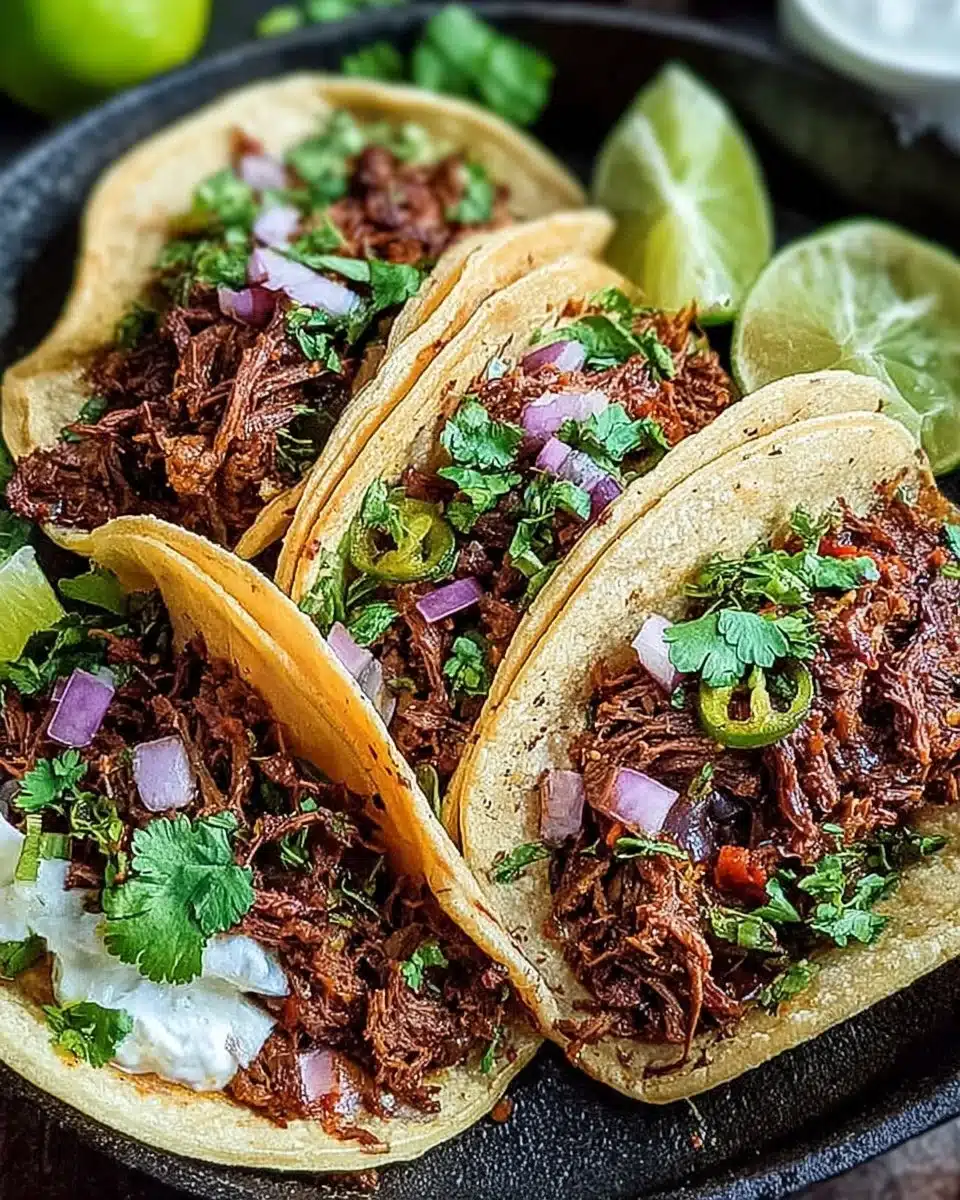
Creamy Queso Chicken Enchiladas Recipe

This post may contain affiliate links.
Creating the perfect Creamy Queso Chicken Enchiladas is a delightful journey that combines simple ingredients with a touch of love. I remember the first time I made these enchiladas; the aroma filled my kitchen, wrapping my family in a warm embrace. Let’s dive into the step-by-step guide that will have you savoring this comforting dish in no time!
What is Creamy Queso Chicken Enchiladas?
Why You’ll Love This Creamy Queso Chicken Enchiladas
- 2 cups cooked shredded chicken
- 1 cup queso cheese
- 8 corn tortillas
- 1 cup enchilada sauce
- 1/2 cup sour cream
- 1/2 cup diced onions
- 1/2 cup chopped cilantro
- 1 teaspoon garlic powder
- 1 teaspoon cumin
- Salt and pepper to taste
Who It’s For
Feel free to swap out the sour cream for Greek yogurt for a healthier twist, or add black beans and corn for extra flavor and texture!
When to Cook It
How to Make the Perfect Creamy Queso Chicken Enchiladas
Ingredients
- Convenience: With a prep time of just 15 minutes and a cook time of 25 minutes, these enchiladas are perfect for busy weeknights when you’re wondering what to make for dinner tonight healthy.
- Rich, creamy taste: The combination of queso cheese and tender chicken creates a flavor profile that appeals to both kids and adults alike, making it a hit at the dinner table.
- Health benefits: Using lean chicken and fresh ingredients means you can enjoy a delicious meal without the guilt, making it a great option for health-conscious cooks.
- Family-friendly: This dish is perfect for gatherings, whether it’s a casual dinner with friends or a cozy family meal. Everyone loves a good enchilada!
- Versatility: These enchiladas are great for meal prep and leftovers. You can easily customize them with different fillings or sauces, making them a go-to for one dish dinners easy.
Step-by-Step Instructions
- Preheat your oven: Set it to 350°F (175°C). This ensures your enchiladas bake evenly and come out perfectly gooey.
- Mix the filling: In a bowl, combine the shredded chicken, queso cheese, sour cream, diced onions, garlic powder, cumin, salt, and pepper. The mixture should be creamy and fragrant.
- Warm the tortillas: Lightly warm the corn tortillas in a skillet until they are pliable. This step is crucial to prevent tearing when you roll them up.
- Fill and roll: Spoon the chicken mixture into each tortilla and roll them up tightly. Place the rolled enchiladas seam-side down in a baking dish.
- Top with sauce: Pour the enchilada sauce generously over the top of the enchiladas, ensuring they are well-coated.
- Bake: Place the dish in the preheated oven and bake for 20-25 minutes until heated through and bubbly.
- Garnish: Before serving, sprinkle with chopped cilantro for a fresh touch.
For People with Diabetes: Sugar Substitutes
- Stevia: A natural sweetener that won’t spike blood sugar.
- Monk fruit: Another great natural option with zero calories.
- Erythritol: A sugar alcohol that has minimal impact on blood sugar levels.
- Allulose: A low-calorie sweetener that tastes like sugar.
It’s best to avoid using honey or maple syrup in this recipe, as they can add unnecessary sugars.
Tools You’ll Need
- Baking dish: A 9×13 inch baking dish is perfect for holding all your enchiladas snugly.
- Mixing bowl: A large bowl for combining your chicken, queso, and other ingredients.
- Skillet: Use this to warm your corn tortillas, making them pliable for rolling.
- Spatula: A sturdy spatula will help you fill and roll the tortillas without tearing them.
- Measuring cups and spoons: Essential for accurately measuring your ingredients.
- Sharp knife: For dicing onions and chopping cilantro with ease.
- Oven mitts: Protect your hands when handling the hot baking dish.
Top Tips from Well-Known Chefs
- Use Fresh Ingredients: Chef Rick Bayless emphasizes the importance of using fresh, high-quality ingredients. Fresh herbs like cilantro and freshly shredded chicken can make a world of difference in flavor.
- Don’t Skip the Tortilla Warming: Chef Pati Jinich suggests warming your tortillas in a dry skillet or microwave before filling them. This step prevents tearing and allows for easier rolling, ensuring your enchiladas hold together beautifully.
- Layer Your Flavors: According to Chef Marcela Valladolid, layering flavors is key. Consider adding sautéed bell peppers or jalapeños to your chicken mixture for an extra kick. This not only enhances the taste but also adds a pop of color to your dish.
- Experiment with Cheese: Chef Aarón Sánchez recommends mixing different types of cheese for a more complex flavor. Try combining queso cheese with Monterey Jack or pepper jack for a delightful twist.
- Let It Rest: After baking, let your enchiladas rest for about 5-10 minutes before serving. This allows the flavors to meld and makes for easier slicing, as Chef José Andrés suggests.
Storing and Reheating Tips
- Vegetarian Enchiladas: Swap out the chicken for a hearty filling of black beans, corn, and sautéed bell peppers. You can also add spinach or zucchini for extra nutrition. The creamy queso cheese will still provide that comforting richness!
- Spicy Kick: If you love heat, add diced jalapeños or a splash of hot sauce to the chicken mixture. You can also use pepper jack cheese instead of queso for an extra layer of spice.
- Cheesy Mushroom Enchiladas: For a unique twist, sauté mushrooms with garlic and onions, then mix them with queso cheese and a sprinkle of thyme. This earthy filling pairs beautifully with the enchilada sauce.
- BBQ Chicken Enchiladas: Give your enchiladas a smoky flavor by mixing shredded chicken with your favorite BBQ sauce instead of the traditional enchilada sauce. Top with queso cheese for a delightful fusion of flavors.
- Low-Carb Option: For a low-carb version, use zucchini or eggplant slices instead of tortillas. Layer the filling and sauce in a baking dish, just like a lasagna, for a deliciously satisfying meal.
Common Mistakes to Avoid
- Choose Quality Tortillas: Opt for fresh corn tortillas if possible. They have a more authentic flavor and texture compared to store-bought options. If you can find homemade tortillas, even better! They will hold up better when filled and rolled.
- Don’t Overfill: While it’s tempting to pack in as much filling as possible, overfilling can lead to torn tortillas and messy enchiladas. Aim for about 1/4 cup of filling per tortilla for the perfect balance.
- Warm Tortillas Properly: Warming your tortillas in a dry skillet or microwave makes them pliable and prevents tearing. This step is crucial for achieving that perfect roll without any breakage.
- Layer Your Sauces: For added depth of flavor, consider mixing your enchilada sauce with a bit of sour cream or queso before pouring it over the rolled enchiladas. This creates a creamy sauce that enhances the overall dish.
- Let It Rest: After baking, allow your enchiladas to rest for about 5-10 minutes before serving. This resting period helps the flavors meld together and makes it easier to serve without falling apart.
- Garnish Generously: Don’t skimp on the garnishes! Fresh cilantro, diced avocados, or a dollop of sour cream can elevate the presentation and add a burst of freshness to each bite.
- Experiment with Cheese: While queso cheese is a must, feel free to mix in other cheeses like Monterey Jack or cheddar for a more complex flavor profile. Each cheese brings its own unique taste and texture.
- Use Homemade Enchilada Sauce: If you have the time, making your own enchilada sauce can take your dish to the next level. A homemade sauce allows you to control the spice level and flavor, ensuring a truly personalized touch.
FAQs About Creamy Queso Chicken Enchiladas
- Refrigerator: Allow the enchiladas to cool completely before transferring them to an airtight container. They can be stored in the fridge for up to 3-4 days. Make sure to layer parchment paper between the enchiladas if stacking them to prevent sticking.
- Freezer: For longer storage, you can freeze the enchiladas. Wrap them tightly in plastic wrap and then place them in a freezer-safe container or a resealable freezer bag. They can be frozen for up to 2-3 months. Just remember to label the container with the date!
Conclusion: Final Thoughts on Creamy Queso Chicken Enchiladas
When it’s time to enjoy your leftovers, reheating them properly is key to preserving their flavor and texture:
By following these storing and reheating tips, you can enjoy your Creamy Queso Chicken Enchiladas just as much the next day as you did when they were freshly made!
As you embark on your culinary adventure with Creamy Queso Chicken Enchiladas, here are some extra clarifications and tips to ensure your dish turns out perfectly:
Enchiladas have a rich history in Mexican cuisine, dating back to the Aztecs who would wrap tortillas around various fillings. Today, they are a beloved comfort food enjoyed in many households. The beauty of enchiladas lies in their versatility; you can find countless regional variations across Mexico, each with its own unique twist. From the spicy red enchiladas of the north to the creamy green varieties of the south, this dish truly embodies the spirit of Mexican culinary tradition.
By keeping these helpful notes in mind, you’ll be well-equipped to create a delicious batch of Creamy Queso Chicken Enchiladas that will impress your family and friends!
When making Creamy Queso Chicken Enchiladas, it’s easy to overlook a few key steps that can make a big difference in the final result. Here are some common pitfalls to watch out for:
By avoiding these common mistakes, you’ll be well on your way to creating perfect Creamy Queso Chicken Enchiladas that will impress everyone at your dinner table!
Q: Can I make Creamy Queso Chicken Enchiladas ahead of time?
Yes, you can prepare the enchiladas in advance and store them in the refrigerator before baking. Just cover them tightly with foil or plastic wrap. When you’re ready to bake, simply remove the cover and follow the baking instructions.
Q: Are Creamy Queso Chicken Enchiladas gluten-free?
It depends on the tortillas you use. Corn tortillas are typically gluten-free, but always check the packaging to ensure they are certified gluten-free. If you use flour tortillas, they will contain gluten.
Q: Can I substitute the chicken with another protein?
Yes, you can easily swap the chicken for shredded beef, turkey, or even a plant-based protein like lentils or black beans for a vegetarian option. Just make sure to adjust the cooking time if necessary.
Q: Is it possible to freeze Creamy Queso Chicken Enchiladas?
Yes, you can freeze the enchiladas before baking. Wrap them tightly in plastic wrap and place them in a freezer-safe container. They can be stored for up to 2-3 months. When ready to eat, thaw in the refrigerator overnight and bake as directed.
Q: How can I make these enchiladas spicier?
Absolutely! You can add diced jalapeños or a splash of hot sauce to the chicken mixture for an extra kick. Additionally, using pepper jack cheese instead of queso will also enhance the heat level.
As I reflect on my journey with Creamy Queso Chicken Enchiladas, I can’t help but feel a deep emotional connection to this dish. It’s more than just a recipe; it’s a celebration of family, warmth, and the joy of sharing a meal together. Each time I prepare these enchiladas, I’m reminded of the laughter and love that fills my kitchen, creating memories that last a lifetime.
I encourage you to try making Creamy Queso Chicken Enchiladas in your own home. Whether it’s a cozy weeknight dinner or a gathering with friends, this dish is sure to bring smiles and satisfaction to your table. Don’t hesitate to get creative with your own variations—perhaps adding your favorite ingredients or spices to make it uniquely yours!
After you’ve tried this recipe, I would love to hear about your experiences. What did you think? Did you add any special twists? Please share your thoughts and variations in the comments below. Let’s inspire each other to keep the spirit of cooking alive!
Print
Creamy Queso Chicken Enchiladas Recipe
- Total Time: 40 minutes
- Yield: 4 servings 1x
- Diet: Gluten Free
Description
Delicious and creamy chicken enchiladas topped with queso cheese, perfect for a cozy dinner.
Ingredients
- 2 cups cooked shredded chicken
- 1 cup queso cheese
- 8 corn tortillas
- 1 cup enchilada sauce
- 1/2 cup sour cream
- 1/2 cup diced onions
- 1/2 cup chopped cilantro
- 1 teaspoon garlic powder
- 1 teaspoon cumin
- Salt and pepper to taste
Instructions
- Preheat your oven to 350°F (175°C).
- In a bowl, mix the shredded chicken, queso cheese, sour cream, diced onions, garlic powder, cumin, salt, and pepper.
- Warm the corn tortillas in a skillet until pliable.
- Fill each tortilla with the chicken mixture and roll them up.
- Place the rolled enchiladas seam-side down in a baking dish.
- Pour the enchilada sauce over the top of the enchiladas.
- Bake in the preheated oven for 20-25 minutes until heated through.
- Garnish with chopped cilantro before serving.
Discover my favorite kitchen tools I always use.


Notes
- Feel free to add black beans or corn for extra flavor.
- Can be made ahead and stored in the refrigerator before baking.
- Serve with a side of guacamole or salsa for added taste.
- Prep Time: 15 minutes
- Cook Time: 25 minutes
- Category: Dinner
- Method: Baking
- Cuisine: Mexican
Nutrition
- Serving Size: 1 enchilada
- Calories: 350
- Sugar: 2g
- Sodium: 600mg
- Fat: 18g
- Saturated Fat: 10g
- Unsaturated Fat: 5g
- Trans Fat: 0g
- Carbohydrates: 30g
- Fiber: 3g
- Protein: 20g
- Cholesterol: 60mg