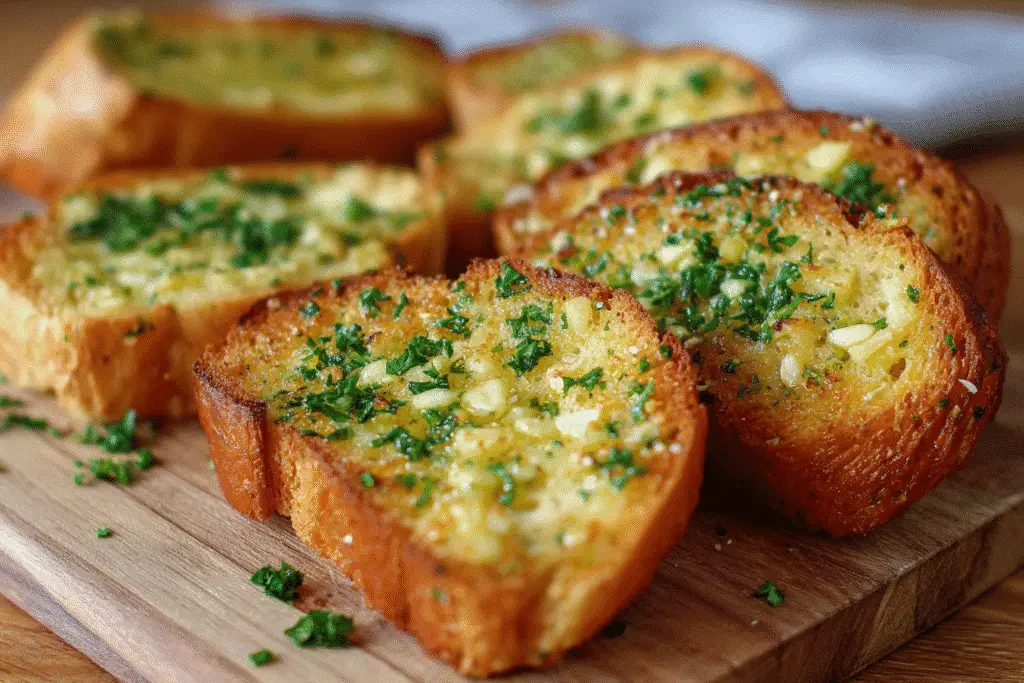
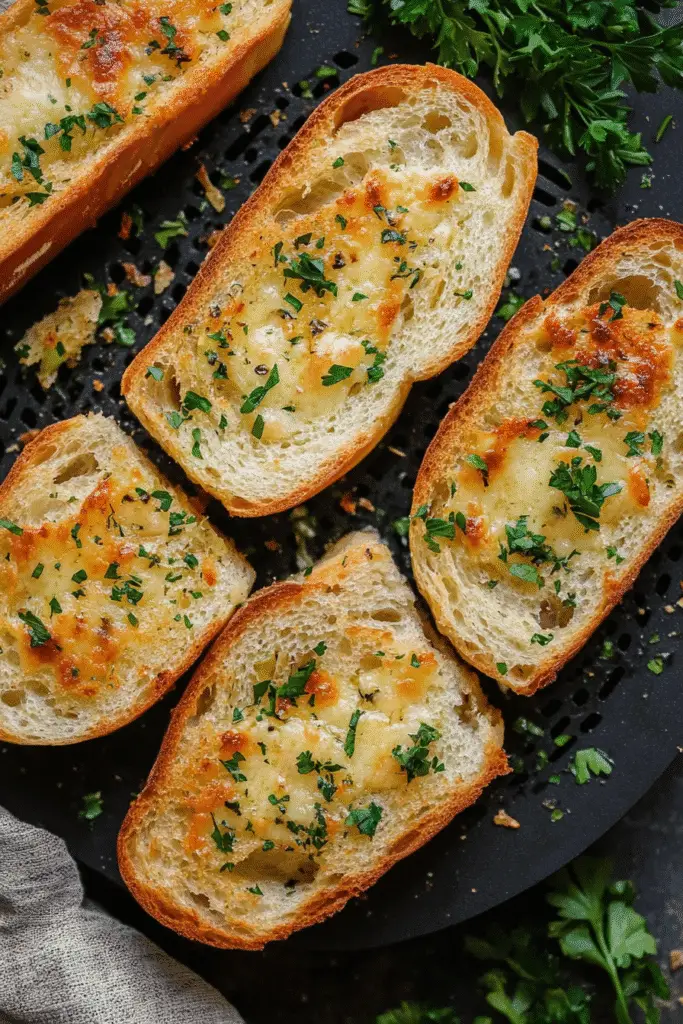
Introduction to Air Fryer Garlic Bread
As a passionate home cook, there’s something magical about the aroma of freshly baked garlic bread wafting through my kitchen. The moment I discovered how to make Air Fryer Garlic Bread, it felt like I had unlocked a culinary treasure. Imagine biting into a perfectly crispy loaf, the buttery garlic flavor dancing on your taste buds, and the warmth wrapping around you like a cozy hug. This recipe is not just about food; it’s about creating memories with family and friends, sharing laughter over a delicious meal, and savoring every bite. Join me as we dive into the delightful world of Air Fryer Garlic Bread and transform your dining experience!

What is Air Fryer Garlic Bread?
Garlic bread has a rich history that traces back to Italy, where it was originally crafted as a way to enhance the flavor of simple, rustic loaves. Traditionally, it’s made by slathering bread with a mixture of garlic, butter, and herbs, then toasting it until golden brown. The Air Fryer Garlic Bread takes this classic dish to new heights, offering a quicker and healthier alternative without sacrificing that beloved crunch and flavor.
Using an air fryer not only reduces cooking time but also minimizes the amount of oil needed, making it a fantastic option for health-conscious cooks. The air fryer circulates hot air around the bread, creating a crispy exterior while keeping the inside soft and fluffy. This method is perfect for busy families who want to whip up a delicious side dish in a fraction of the time.
Globally, garlic bread has evolved, with variations popping up in different cultures. From the cheesy garlic bread of the United States to the herb-infused versions found in Mediterranean cuisine, this dish has become a beloved staple in many households. With the Air Fryer Garlic Bread, you can enjoy a taste of Italy right in your own kitchen, bringing a touch of warmth and comfort to your family meals.
Why You’ll Love This Air Fryer Garlic Bread
- Quick and Easy: With just 10 minutes of prep and 7 minutes of cooking, you can have delicious garlic bread ready in no time!
- Irresistible Flavor: The combination of garlic, butter, and herbs creates a mouthwatering aroma that fills your kitchen and delights your taste buds.
- Healthier Option: Using an air fryer means less oil and fewer calories, making it a guilt-free indulgence for everyone.
- Family-Friendly: Kids and adults alike will love this crispy treat, making it a perfect side for family dinners or gatherings.
- Versatile: Customize it with your favorite toppings, from cheese to spices, to suit every palate!
Who It’s For
This Air Fryer Garlic Bread is perfect for busy families looking for quick meal solutions, health-conscious cooks wanting to enjoy a classic without the extra calories, and food lovers eager to explore new flavors. Whether you’re a novice in the kitchen or a seasoned chef, this recipe is designed to bring joy and satisfaction to your table.
When to Cook It
Enjoy this delightful garlic bread during weeknight dinners when time is tight, at celebrations where you want to impress guests, or as a comforting side dish for family meals. It’s also a fantastic addition to pasta nights, barbecues, or even as a snack while watching your favorite movie!
How to Make the Perfect Air Fryer Garlic Bread
Ingredients
- 1 loaf of French bread: This serves as the base for your garlic bread. You can substitute with Italian bread or even a gluten-free option if needed.
- 1/2 cup unsalted butter, softened: Butter adds richness. For a healthier alternative, use olive oil or a plant-based butter.
- 4 cloves garlic, minced: Fresh garlic provides that signature flavor. If you’re short on time, garlic powder can be used, but fresh is best!
- 2 tablespoons fresh parsley, chopped: This adds a pop of color and freshness. Dried parsley can be used in a pinch, but fresh is more aromatic.
- 1/2 teaspoon salt: Enhances all the flavors. Adjust to taste, especially if you’re watching your sodium intake.
- 1/4 teaspoon black pepper: Adds a subtle kick. Feel free to increase this for a spicier version.
- 1/4 teaspoon Italian seasoning: A blend of herbs that complements the garlic beautifully. You can also use oregano or basil if you prefer.
Step-by-Step Instructions
- Preheat your air fryer: Set it to 350°F (175°C) to ensure even cooking.
- Mix the garlic butter: In a bowl, combine the softened butter, minced garlic, chopped parsley, salt, pepper, and Italian seasoning. Stir until well blended, and let the aroma fill your kitchen!
- Prepare the bread: Slice the French bread in half lengthwise, revealing the soft, fluffy interior.
- Spread the garlic butter: Generously spread the garlic butter mixture over the cut sides of the bread, ensuring every inch is covered for maximum flavor.
- Air fry the bread: Place the bread halves in the air fryer basket, cut side up. Cook for 5-7 minutes, or until the bread is golden brown and crispy. Keep an eye on it; the aroma will guide you!
- Serve and enjoy: Once done, remove the bread from the air fryer, let it cool slightly, then slice and serve. The crispy edges and soft center will have everyone coming back for more!
For People with Diabetes: Sugar Substitutes
If you’re looking for sugar substitutes, consider using stevia, monk fruit, erythritol, or allulose. These options provide sweetness without the calories. Avoid honey or maple syrup, as they can spike blood sugar levels.

Tools You’ll Need
- Air Fryer: The star of the show! Any model will do, but a basket-style air fryer is great for even cooking.
- Mixing Bowl: A medium-sized bowl for combining your garlic butter ingredients. A whisk can help blend everything smoothly.
- Butter Knife or Spreader: For spreading the garlic butter mixture evenly over the bread.
- Cutting Board: Essential for slicing your French bread without damaging your countertops.
- Sharp Knife: A serrated knife works best for cutting through the crusty exterior of the bread.
- Measuring Spoons: To ensure you get the right amounts of garlic, herbs, and seasonings.
- Spatula or Tongs: Handy for safely removing the hot garlic bread from the air fryer once it’s done cooking.
Tips from Well-Known Chefs
When it comes to making the perfect Air Fryer Garlic Bread, I’ve gathered some invaluable tips from renowned chefs that can elevate your dish to new heights. These expert-approved hacks will ensure your garlic bread is not only delicious but also impressively crafted.
- Use Fresh Ingredients: Chef Giada De Laurentiis emphasizes the importance of using fresh garlic and herbs. Fresh ingredients enhance the flavor profile, making your garlic bread truly irresistible.
- Experiment with Cheese: According to Chef Mario Batali, adding a sprinkle of grated Parmesan or mozzarella on top before air frying can create a delightful cheesy crust. This adds an extra layer of flavor and texture that cheese lovers will adore!
- Brush, Don’t Spread: Chef Ina Garten suggests brushing the garlic butter mixture onto the bread instead of spreading it. This technique allows for a more even distribution and prevents the bread from becoming soggy.
- Let It Rest: Chef Thomas Keller advises letting the garlic bread rest for a minute after air frying. This brief pause allows the flavors to meld and the bread to firm up, resulting in a better texture.
- Customize Your Herbs: Chef Jamie Oliver encourages creativity with herbs. Feel free to mix in fresh basil, thyme, or even a hint of chili flakes for a spicy kick. Tailoring the herbs to your taste can make your Air Fryer Garlic Bread uniquely yours!
By incorporating these chef-approved tips, you’ll not only enhance the flavor of your garlic bread but also impress your family and friends with your culinary skills. Happy cooking!
Delicious Variations to Customize Your Garlic Bread
One of the joys of making Air Fryer Garlic Bread is the endless possibilities for customization. Whether you’re looking to cater to specific dietary needs or simply want to experiment with flavors, here are some delightful variations to consider:
- Cheesy Garlic Bread: For a rich, indulgent twist, sprinkle shredded mozzarella or Parmesan cheese on top of the garlic butter before air frying. The cheese will melt beautifully, creating a gooey, savory topping that’s hard to resist.
- Herbed Garlic Bread: Mix in a variety of fresh herbs like basil, thyme, or rosemary into your garlic butter. This not only adds a burst of flavor but also brings a fragrant aroma that will fill your kitchen.
- Spicy Garlic Bread: If you love a bit of heat, add a pinch of red pepper flakes or a dash of hot sauce to the garlic butter mixture. This spicy kick will elevate your garlic bread to a whole new level!
- Vegan Garlic Bread: Substitute the unsalted butter with a plant-based butter or olive oil to create a vegan-friendly version. You can also use nutritional yeast instead of cheese for a cheesy flavor without the dairy.
- Sun-Dried Tomato and Garlic Bread: Incorporate chopped sun-dried tomatoes into the garlic butter for a Mediterranean flair. The sweet and tangy tomatoes pair perfectly with the garlic, creating a unique flavor profile.
- Garlic Bread with Pesto: Spread a layer of basil pesto on the bread before adding the garlic butter. This combination brings a fresh, herby taste that’s simply irresistible.
Feel free to mix and match these variations to create your own signature garlic bread. Each twist offers a new experience, making it easy to keep this classic dish exciting and fresh for every meal!
Top Tips for Perfecting Your Air Fryer Garlic Bread
Creating the perfect Air Fryer Garlic Bread is an art, and with a few expert techniques and cooking hacks, you can elevate your dish to restaurant-quality status. Here are some top tips that I’ve gathered from my kitchen experiences and culinary inspirations:
- Preheat Your Air Fryer: Just like an oven, preheating your air fryer ensures even cooking. This step helps achieve that golden-brown crust while keeping the inside soft and fluffy.
- Don’t Skimp on the Garlic: For a robust flavor, use fresh garlic instead of garlic powder. The aroma of freshly minced garlic is unbeatable and will make your kitchen smell divine!
- Spread Evenly: When applying the garlic butter mixture, use a butter knife or a spatula to spread it evenly. This ensures every bite is packed with flavor and prevents any dry spots.
- Experiment with Cooking Times: Every air fryer is different, so keep an eye on your garlic bread as it cooks. Start with the recommended time, but check for that perfect golden color and adjust as needed.
- Let It Rest: After air frying, allow your garlic bread to rest for a minute before slicing. This helps the flavors meld together and gives the bread a chance to firm up, enhancing the texture.
- Use Quality Bread: The type of bread you choose can make a significant difference. Opt for a fresh, crusty French or Italian loaf for the best results. Stale bread can work in a pinch, but fresh is always better!
- Garnish with Fresh Herbs: After cooking, sprinkle some additional fresh parsley or basil on top for a pop of color and freshness. This not only enhances the visual appeal but also adds a burst of flavor.
- Pair with Dipping Sauces: Serve your Air Fryer Garlic Bread with a side of marinara sauce, pesto, or even a balsamic reduction for dipping. This adds an extra layer of flavor and makes for a delightful appetizer.
By incorporating these tips into your cooking routine, you’ll not only perfect your Air Fryer Garlic Bread but also impress your family and friends with your culinary prowess. Happy cooking!
Storing and Reheating Tips
Once you’ve made your delicious Air Fryer Garlic Bread, you might find yourself with some leftovers (if you’re lucky!). Here’s how to store and reheat your garlic bread to keep it tasting fresh and flavorful:
Storing Garlic Bread
- In the Fridge: Allow the garlic bread to cool completely before storing. Wrap it tightly in aluminum foil or place it in an airtight container. It can be stored in the fridge for up to 2 days.
- In the Freezer: For longer storage, freeze the garlic bread. Wrap each half in plastic wrap, then in aluminum foil to prevent freezer burn. It can be frozen for up to 3 months. When you’re ready to enjoy it, simply thaw in the fridge overnight.
Reheating Garlic Bread
- In the Air Fryer: Preheat your air fryer to 350°F (175°C). Place the garlic bread in the basket and air fry for about 3-5 minutes, or until heated through and crispy again. This method helps restore that delightful crunch!
- In the Oven: Preheat your oven to 350°F (175°C). Place the garlic bread on a baking sheet and cover it loosely with aluminum foil to prevent over-browning. Heat for about 10 minutes, or until warmed through.
- In the Microwave: While not the best option for maintaining crispiness, you can microwave the garlic bread for about 15-20 seconds. To help retain some texture, place a cup of water in the microwave alongside the bread to create steam.
By following these storing and reheating tips, you can enjoy your Air Fryer Garlic Bread even after the initial meal, ensuring that every bite remains as delicious as the first! Happy snacking!

Helpful Notes
As you embark on your journey to create the perfect Air Fryer Garlic Bread, here are some extra clarifications and tips to enhance your cooking experience:
- Ingredient Prep: Make sure your butter is softened to room temperature for easy mixing. If you forget to take it out in advance, you can microwave it for about 10 seconds to soften it, but be careful not to melt it!
- Substitutions: If you don’t have fresh parsley on hand, feel free to use dried parsley, though the flavor will be less vibrant. You can also experiment with other herbs like chives or cilantro for a unique twist.
- Gluten-Free Options: For those with gluten sensitivities, gluten-free bread works wonderfully in this recipe. Just ensure it’s a sturdy loaf to hold up to the garlic butter.
- Regional Variations: In Italy, garlic bread is often enjoyed with a drizzle of olive oil instead of butter. You can try this variation for a lighter, Mediterranean-inspired version of Air Fryer Garlic Bread.
- Storage Tips: If you plan to make a larger batch, consider freezing some for later. Just remember to wrap it well to prevent freezer burn, and you’ll have a quick side dish ready whenever you need it!
- Serving Suggestions: Pair your garlic bread with a fresh salad or a hearty soup for a complete meal. It also makes a fantastic appetizer for gatherings, inviting everyone to dig in!
These helpful notes will ensure that your Air Fryer Garlic Bread turns out perfectly every time, allowing you to enjoy this delightful dish with confidence and creativity!
Common Mistakes to Avoid
- Not Preheating the Air Fryer: Skipping this step can lead to uneven cooking. Always preheat your air fryer to ensure that your Air Fryer Garlic Bread cooks evenly and achieves that perfect golden-brown crust.
- Overloading the Basket: Crowding the air fryer basket can prevent proper air circulation, resulting in soggy bread. Cook in batches if necessary to maintain that crispy texture.
- Using Cold Butter: If your butter is too cold, it won’t spread easily and may not mix well with the garlic and herbs. Always use softened butter for a smooth, flavorful garlic spread.
- Ignoring Cooking Times: Every air fryer is different, so keep an eye on your garlic bread as it cooks. Overcooking can lead to burnt edges, while undercooking can leave it chewy. Adjust the time based on your air fryer’s performance.
- Forgetting to Let It Rest: After air frying, allow your garlic bread to rest for a minute before slicing. This helps the flavors meld and improves the overall texture, making each bite more enjoyable.
FAQs About Air Fryer Garlic Bread
Q: Can I use frozen bread to make Air Fryer Garlic Bread?
Yes, you can use frozen bread! Just make sure to thaw it completely before spreading the garlic butter mixture. This will ensure even cooking and a crispy texture.
Q: Is Air Fryer Garlic Bread suitable for a vegan diet?
Yes, it depends on the ingredients you choose. By substituting the unsalted butter with a plant-based butter or olive oil, you can easily make a delicious vegan version of Air Fryer Garlic Bread.
Q: Can I make Air Fryer Garlic Bread without fresh garlic?
No, while you can use garlic powder in a pinch, fresh garlic provides the best flavor and aroma. For the most authentic taste, I recommend sticking with fresh garlic.
Q: How long does Air Fryer Garlic Bread last?
It depends on how you store it. In the fridge, it can last up to 2 days, while in the freezer, it can be kept for up to 3 months. Just make sure to wrap it properly to maintain freshness!
Q: Can I add cheese to my Air Fryer Garlic Bread?
Yes! Adding cheese is a fantastic idea. Sprinkle some grated Parmesan or mozzarella on top before air frying for a deliciously cheesy twist on your Air Fryer Garlic Bread.

Conclusion: Final Thoughts on Air Fryer Garlic Bread
As we wrap up our journey into the world of Air Fryer Garlic Bread, I hope you feel inspired to bring this delightful dish into your home. The crispy, buttery goodness is not just a side; it’s a way to create cherished moments around the dinner table. Whether you’re enjoying it with family or sharing it with friends, each bite is a reminder of the love and warmth that good food brings. I encourage you to try this recipe, experiment with your own variations, and share your experiences in the comments below. Happy cooking, and may your kitchen always be filled with the aroma of garlic bread!
Print
Air Fryer Garlic Bread
- Total Time: 17 minutes
- Yield: 4 servings 1x
- Diet: Vegetarian
Description
Learn how to make deliciously crispy garlic bread using your air fryer with this easy recipe.
Ingredients
- 1 loaf of French bread
- 1/2 cup unsalted butter, softened
- 4 cloves garlic, minced
- 2 tablespoons fresh parsley, chopped
- 1/2 teaspoon salt
- 1/4 teaspoon black pepper
- 1/4 teaspoon Italian seasoning
Instructions
- Preheat your air fryer to 350°F (175°C).
- In a bowl, mix the softened butter, minced garlic, parsley, salt, pepper, and Italian seasoning until well combined.
- Slice the French bread in half lengthwise.
- Spread the garlic butter mixture evenly over the cut sides of the bread.
- Place the bread halves in the air fryer basket, cut side up.
- Air fry for 5-7 minutes, or until the bread is golden brown and crispy.
- Remove from the air fryer, let cool slightly, then slice and serve.
Notes
- For extra flavor, add grated Parmesan cheese on top before air frying.
- Adjust the garlic amount according to your taste preference.
- Store any leftovers in an airtight container for up to 2 days.
- Prep Time: 10 minutes
- Cook Time: 7 minutes
- Category: Appetizer
- Method: Air Frying
- Cuisine: Italian
Nutrition
- Serving Size: 1 slice
- Calories: 200
- Sugar: 1g
- Sodium: 300mg
- Fat: 18g
- Saturated Fat: 10g
- Unsaturated Fat: 6g
- Trans Fat: 0g
- Carbohydrates: 15g
- Fiber: 1g
- Protein: 2g
- Cholesterol: 30mg
Keywords: Air Fryer Garlic Bread